1. Introduction
StrictDoc is software for technical documentation and requirements management.
Summary of StrictDoc features:
- The documentation files are stored as human-readable text files.
- StrictDoc supports two input document formats: SDoc (*.sdoc) and Markdown (*.md, see 🔗 23.1. Markdown support (experimental)).
- StrictDoc reads these files and builds an in-memory representation of a document tree.
- From this in-memory representation, StrictDoc can generate the documentation into a number of formats including HTML, RST, ReqIF, PDF, JSON, Excel.
- StrictDoc has a web-based user interface which allows viewing and editing the documents and requirements. The changes are written back to .sdoc files and Markdown files.
- The focus of the tool is modeling requirements and specifications documents. Such documents consist of multiple statements like "system X shall do Y" called requirements.
- The requirements can be linked together to form the relationships, such as "parent-child". From these connections, many useful features, such as Requirements Traceability and Documentation Coverage, can be derived.
- Requirements to source files traceability (experimental). See 🔗 11. Traceability between requirements and source code.
- Document grammar and custom fields support. The StrictDoc's grammar can be extended to support arbitrary special fields, such as "PRIORITY", "OWNER", or even more specialized fields, such as "Automotive Safety Integrity Level (ASIL)" or "Verification method". See 🔗 6.3. Document grammar.
- Good performance of the textX parser and parallelized incremental generation of documents: generation of document trees with up to 2000–3000 requirements into HTML pages stays within a few seconds. From the second run, only changed documents are regenerated. Further performance tuning should be possible.
See also a summary of StrictDoc's existing limitations: 🔗 24. StrictDoc's limitations.
1.1. Contact the developers
Join the StrictDoc mailing list on groups.io: https://groups.io/g/strictdoc. As of Q1 2025, this is the primary channel for general discussions and announcements about StrictDoc, uniting three previously separate communities: email, GitHub, and Discord.
For more interactive discussions, join us in Discord. Here is the invitation link: https://discord.gg/4BAAME9MmG.
The developers can be also contacted via email: Stanislav Pankevich s.pankevich@gmail.com and Maryna Balioura mettta@gmail.com.
See also 🔗 F.A.Q. for common topics and 🔗 Troubleshooting for troubleshooting the most common issues.
1.1.1. StrictDoc office hours
The StrictDoc team hosts a weekly 1-hour office hours meeting.
StrictDoc Office Hours provide an open space for users and contributors to connect with the core team. Spontaneous participation is highly encouraged – feel free to join at any time with questions, ideas, or feedback. By default, these slots are used for StrictDoc development unless a specific topic is agreed upon in advance.
The goal is to balance core development priorities with community-driven input. While the team follows a focused roadmap, these sessions create space for discussing feature requests, improvements, and other topics that matter most to users – especially active contributors. Agenda updates will be posted in the calendar when applicable.
Here is a public Google calendar to subscribe to.
When adding the calendar, it's recommended to enable notifications for new and updated events. This ensures you'll be informed if an event's agenda is updated with announcements or if the event is canceled.
2. Examples
2.1. Hello World
"Hello World" example of the SDoc text language:
[DOCUMENT]
TITLE: High-Level Requirements
PREFIX: HLR-

[REQUIREMENT]
UID: HLR-1
TITLE: Initial high-level requirement
STATEMENT: >>>
The system shall provide a hello world application.
<<<
Open a command-line terminal program supported on your system.
Once you have strictdoc installed (see 🔗 3. Installing StrictDoc below), use the strictdoc new command to generate a hello world project skeleton.
cd <a parent folder of your choice>
Run StrictDoc as follows:
strictdoc new hello_world
The expected output:
╔════════════════════════════════════════════════════════════╗
║            StrictDoc project skeleton created              ║
╚════════════════════════════════════════════════════════════╝

Location: hello_world

Next steps:

1. Change into the project directory

  cd hello_world

2. Export static HTML documentation

  strictdoc export .

3. Start the web server

  strictdoc server .

Total execution time ........................................ 0.01s
2.2. StrictDoc Examples repository
The strictdoc-examples repository contains a collection of basic examples. Visit the repository and read its README for details.
2.3. StrictDoc Templates repository
The strictdoc-templates repository contains a growing collection of templates from the industry standards like DO-178C (aviation) and ECSS-E-ST-40C (space).
2.4. Other examples
For a more comprehensive example, check the source file of this documentation which is written using StrictDoc: strictdoc_01_user_guide.sdoc.
3. Installing StrictDoc
3.1. Requirements
- Python 3.10+
- macOS, Linux or Windows
- Command-line terminal program
Depending on an operating system, a terminal program can be, for example:
- Terminal or iTerm2 on macOS
- Gnome Terminal or konsole on Linux
- Terminal or PowerShell on Windows.
A terminal program is required to input all the commands outlined in this user guide.
3.2. Installing StrictDoc as a Pip package (recommended way)
pip install strictdoc
3.3. Installing "nightly" StrictDoc as a Pip package
Sometimes, it takes a while before the latest features and fixes reach the stable Pip release. In that case, installing a Pip package from the Git repository directly is possible:
pip install -U --pre git+https://github.com/strictdoc-project/strictdoc.git@main
3.4. Installing StrictDoc into a Docker container
StrictDoc can be installed with a dedicated Docker image.
To build the image:
docker build . \
    --build-arg STRICTDOC_SOURCE=pypi \
    -t strictdoc:latest
The STRICTDOC_SOURCE argument is optional (default value is pypi) and can be used to specify which Git revision the container shall check out when installing StrictDoc with pip install. Possible values: a branch name, e.g., main, or a commit hash.
To run the container:
docker run \
    --name strictdoc \
    --rm \
    -e HOST_UID=$(id -u) \
    -e HOST_GID=$(id -g) \
    -v "$(pwd):/data" \
    -i -t \
    strictdoc:latest \
    /bin/bash -c "strictdoc export --formats=html"
| Option | Description |
|---|---|
| --rm | Remove container when it is exited. |
| HOST_UID and HOST_GID | These environment variables are used to tell the container that it should create a strictdoc user that has these values. This enables the content generated by the container to be visible outside the container under the permissions of the host user. |
| -v "<folder on host>:/data" | Normally the folder on the host should be the folder with the StrictDoc documentation. The /data folder must always be specified without change because that's where the Docker container is designed to operate. |
| /bin/bash -c "..." | This command shall typically be strictdoc export but it can also be skipped in which case the docker run will enter the container with SSH. |
If entering the container manually, the strictdoc command can be run as follows:
bash-5.1# strictdoc export .
bash-5.1# exit
The documentation shall be generated to ./output/html which is accessible both on the host and inside the container.
3.5. Installing StrictDoc as a Snap package (not maintained)
This way of installing StrictDoc is not maintained anymore. If you want to use it, refer to the instructions located in developer/snap/README.md.
3.6. Installing StrictDoc with Nix
StrictDoc is packaged in nixpkgs as strictdoc.
You can try it without installing with nix-shell:
nix-shell -p strictdoc
or nix run:
nix run nixpkgs#strictdoc
Or you can add it to your system's packages with:
environment.systemPackages = [
    pkgs.strictdoc
];
4. Running StrictDoc
4.1. Static HTML export
The easiest way to see the static HTML export feature in action is to run the 🔗 2.1. Hello World example.
The export command is the main producer of documentation. The native export format of StrictDoc is HTML. The export command supports a number of parameters, including the option for selecting export formats (HTML, RST, Excel, etc.). The options can be explored with the --help command.
strictdoc export --help
4.2. Web server
StrictDoc supports a web-based user interface. The StrictDoc web server is launched via the server command which accepts a path to a documentation tree as a parameter.
strictdoc server .
The server command accepts a number of options. To explore the options, run:
strictdoc server --help
StrictDoc uses 127.0.0.1 as a default host and 5111 as a default port. When running within Docker, the host argument --host can be specified, for example, --host 0.0.0.0 or a more specific host or IP address. The host and port can be also configured in the Python config file, see 🔗 17.1.12.1. Host and port.
Note
The implementation of the web interface is work-in-progress. See 🔗 24.2. Limitations of web user interface for an overview of the existing limitations.
4.2.1. Live reload (--watch)
The --watch option enables automatic detection of file changes and live reload of all connected browsers:
strictdoc server --watch .
When --watch is active, StrictDoc monitors the input document files for changes. If a file is modified by an external tool (such as a text editor or a version control operation), StrictDoc rebuilds the documentation tree and sends a reload signal to all connected browser tabs.
Note
Live reload is triggered only by external changes to the watched files. Edits made through the StrictDoc web interface itself do not trigger a reload, since the server already handles those changes internally.
4.3. Security considerations
Warning
TL;DR: StrictDoc's web server is not yet hardened against unsafe use. Making StrictDoc safe for deployment in public networks is an ongoing effort.
Using StrictDoc's command-line and web interfaces should be more secure if the web server is not deployed on a public network.
Due to current constraints (refer to 🔗 24.2. Limitations of web user interface), StrictDoc requires running a server through a command line interface in one window or OS process, and separately committing changes to documents using Git in another window or OS process. Deploying StrictDoc as a shared web server is impractical, as it still requires manual commits to SDoc files via the server's command line using Git. The future development plan for StrictDoc aims to enable its use as a standalone server application, which includes resolving the following security-related issues.
What makes StrictDoc's web server unsafe:
- The web interface is not fully hardened against unsafe inputs, such as malformed strings or files. The web server does not perform comprehensive sanity checks on the size and validity of inputs across all its HTTP endpoints.
- StrictDoc uses the pickle module to cache SDoc files, significantly improving performance. However, the pickle module is not secure. The pickled files are currently stored in the /tmp folder, which poses risks under certain circumstances.
- The security-related properties of the textX/Arpeggio parser are not understood yet. We have opened a request to track this upstream: textX - Security considerations (#422).
- Several uses of regular expressions may be unsafe, some of which have been identified by GitHub's CodeQL analyzer.
- The security aspects of StrictDoc's dependencies have not yet been analyzed.
Known security-related issues are tracked on GitHub, under the "Security" label. As StrictDoc becomes usable without command-line access, all known issues will need to be addressed or acknowledged as known limitations.
We are committed to continuously enhancing the functionality and security of StrictDoc and welcome user feedback and contributions in this area.
5. IDE support
StrictDoc language markup (SDoc) can be activated in all IDEs that support the TextMate grammars. When the StrictDoc grammar is integrated into an IDE, the SDoc syntax becomes highlighted just as any other syntax like Markdown, RST, Python, etc.
The TextMate grammars can be defined in either JSON or PLIST formats. The Sublime Text's Syntax is similar to the TextMate grammar but has more capabilities and is no longer backward-compatible with both TextMate's JSON and PLIST grammars.
The following IDEs are known to work:
- Microsoft Visual Studio Code (TextMate JSON)
- JetBrains's PyCharm and WebStorm (TextMate JSON). The other JetBrains IDEs are expected to work too.
- Eclipse (TextMate JSON)
- Sublime Text (Sublime Syntax)
- Neovim (Tree-sitter grammar)
Due to the incompatibilities between these formats, the markup files are provided in separate repositories:
- strictdoc-project/strictdoc.tmLanguage – TextMate grammar files for StrictDoc (JSON).
- strictdoc-project/strictdoc.tmbundle – TextMate grammar files for StrictDoc (PLIST).
- strictdoc-project/strictdoc.sublime-syntax – StrictDoc markup syntax highlighting in Sublime Text.
- manueldiagostino/tree-sitter-strictdoc – StrictDoc Tree‑sitter parser for Neovim.
The instructions for installing the StrictDoc markup can be found in all repositories.
For any other IDE, when possible, it is recommended to use the TextMate JSON format, unless a given IDE is known to only support the TextMate bundle format (.tmbundle). The exception is Sublime Text which has its own format.
Note
The TextMate grammar and the Sublime Syntax for StrictDoc only provides syntax highlighting. More advanced features like autocompletion and deep validation of requirements can be only achieved with a dedicated Language Server Protocol (LSP) implementation for StrictDoc. The StrictDoc LSP is on StrictDoc's long-term roadmap, see Enhancement: Language Protocol Server for SDoc text language #577.
6. SDoc syntax
StrictDoc defines a special syntax for writing specifications documents. This syntax is called SDoc and it's grammar is encoded with the textX tool.
The grammar is defined using textX language for defining grammars and is located in a grammar file: grammar.py.
This is how a minimal possible SDoc document looks like:
[DOCUMENT]
TITLE: StrictDoc
This documentation is written using StrictDoc. Here is the source file: strictdoc_01_user_guide.sdoc.
6.1. Document structure
An SDoc document consists of a [DOCUMENT] declaration followed by a sequence of leaf nodes or composite nodes.
A leaf node cannot contain any child nodes. It is simply a node with text fields. The default leaf nodes are defined as [TEXT] or [REQUIREMENT]. Any other [...] custom leaf node can be registered by a user in a document grammar as described below in 🔗 6.3. Document grammar.
Example of a leaf node:
[REQUIREMENT]
STATEMENT: StrictDoc shall be based on a document model.
A composite node can contain other composite or leaf nodes. The default composite node is [[SECTION]] which models a section/chapter in a document. Any other [[...]] composite node can be registered by a user in a document grammar.
Example of a composite node:
[[SECTION]]
TITLE: Document model

[REQUIREMENT]
STATEMENT: StrictDoc shall be based on a document model.

[[/SECTION]]
The document elements are described further below in 🔗 6.2. Document elements.
6.2. Document elements
6.2.1. DOCUMENT
The [DOCUMENT] element must always be present in an SDoc document. It is a root of an SDoc document graph.
[DOCUMENT]
TITLE: StrictDoc
The following DOCUMENT fields are allowed:
| Field | Description |
|---|---|
| TITLE | Title of the document (mandatory) |
| UID | Unique identifier of the document |
| VERSION | Current version of the document. Special @-macros GIT_VERSION and GIT_BRANCH can be used to get the document version from Git automatically. Example: VERSION: @GIT_VERSION (Git branch: @GIT_BRANCH). |
| DATE | Publication date of the document. Special @-macros GIT_COMMIT_DATE and GIT_COMMIT_DATETIME can be used to get the document date from Git. Example: DATE: @GIT_COMMIT_DATETIME. |
| CLASSIFICATION | Security classification of the document, e.g. Public, Internal, Restricted, Confidential |
| PREFIX (formerly REQ_PREFIX) | Requirement prefix that should be used for automatic generation of UIDs. See 🔗 9.1. Automatic assignment of requirements UID. This field used to be called REQ_PREFIX but it was deprecated since 2025-Q2. The REQ_PREFIX alias will be removed from the codebase in 2025-Q3. |
| ROOT | Defines whether a document is a root object in a traceability graph. A root document is assumed to not have any parent requirements. The project statistics calculation will skip all root document's requirements when calculating the metric Non-root-level requirements not connected to any parent requirement. |
| OPTIONS | Document configuration options |
The DOCUMENT declaration must always have a TITLE field. The other fields are optional. The OPTIONS field can be used for specifying the document configuration options.
Note
The sequence of the fields is defined by the document's Grammar, i.e. should not be changed.
6.2.1.1. Document configuration options
The OPTIONS field may have the following attribute fields:
| Field | Attribute values |
|---|---|
| ENABLE_MID | False (default), True |
| MARKUP | RST (default), HTML, Text |
| AUTO_LEVELS | On (default), Off |
| VIEW_STYLE | Inline (default), Table, Zebra |
| NODE_IN_TOC | True (default), False |
6.2.1.1.1. ENABLE_MID
6.2.1.1.2. MARKUP
The MARKUP option controls which markup renderer will be used. The available options are: RST, HTML and Text. Default is RST.
6.2.1.1.3. AUTO_LEVELS
The AUTO_LEVELS option controls StrictDoc's system of automatic numbering of the section levels. The available options are: On / Off. Default is On.
In case of On, the [SECTION].LEVEL fields must be absent or may only contain None to exclude that section from StrictDoc's automatic section numbering. See also 🔗 6.2.4.3. LEVEL.
In case of Off, all [SECTION].LEVEL fields must be populated.
6.2.1.1.4. VIEW_STYLE
The VIEW_STYLE option controls whether requirement's elements are displayed inline or as table blocks. The available options are:
- Narrative
- Inline
- Table
- Zebra
- Plain
The default style is Narrative. This style displays meta information and prints node fields without surrounding tables, making it most suitable for documents where nodes contain descriptive content (i.e., paragraphs of text).
The Inline, Table, and Zebra styles are all variations of a table-based format designed for requirement-like nodes.
The Plain style is the simplest option, showing only the content of the node fields without any meta information.
[DOCUMENT]
TITLE: Hello world
OPTIONS:
  VIEW_STYLE: Narrative
Note
The VIEW_STYLE option can be also specified individually for each grammar element, see 🔗 6.3.2.3. VIEW_STYLE.
6.2.1.1.5. NODE_IN_TOC
The NODE_IN_TOC option controls whether requirement's title appear in the table of contents (TOC). The available options are: True / False. Default is True.
[DOCUMENT]
TITLE: Hello world
OPTIONS:
  NODE_IN_TOC: True
6.2.1.2. Additional Metadata
StrictDoc allows additional metadata to be added in the [DOCUMENT] element. The METADATA: field accepts any number of entries, each consisting of a key-value pair on a separate line. Keys must begin with a letter and end with a colon, but are not otherwise constrained.
[DOCUMENT]
TITLE: Hello world
OPTIONS:
  NODE_IN_TOC: True
METADATA:
  AUTHOR: John Doe
  APPROVED_BY: Jane Smith
The additional metadata is also included on the front page of the exported PDF. This is useful for displaying document-specific information, such as the author's name or project identifiers.
Note
The front page can be further customised using the html2pdf_template directive in strictdoc_config.py. See 🔗 17.1.6. Path to custom HTML2PDF template.
6.2.2. Leaf nodes
6.2.2.1. TEXT
A text node is the most basic document node which is used for normal document text. The [TEXT] is one of the default leaf elements declared in StrictDoc's default grammar. See 🔗 6.3. Document grammar.
[DOCUMENT]
TITLE: StrictDoc

[TEXT]
STATEMENT: >>>
StrictDoc is software for technical documentation.
<<<
According to the 🔗 6.5.2. Strict rule #2: No content is allowed outside of SDoc grammar, arbitrary content cannot be written outside of StrictDoc's grammar structure. The [TEXT] node is therefore a designated grammar element for writing arbitrary text content, unless the other nodes, such as REQUIREMENT, are used instead.
Warning
If your project still uses older [FREETEXT] tags, consider migrating to the new [TEXT] syntax. The rationale behind FREETEXT-TEXT change and the migration path are described in 🔗 26.1. FREETEXT-TEXT migration (June 2024).
6.2.2.2. REQUIREMENT
The REQUIREMENT is used for creating requirements, for example technical requirements or project requirements.
Similar to TEXT, the REQUIREMENT is a default leaf element declared in StrictDoc's default grammar, see 🔗 6.3. Document grammar.
[DOCUMENT]
TITLE: StrictDoc

[REQUIREMENT]
TITLE: Requirements management
STATEMENT: StrictDoc shall enable requirements management.
The following REQUIREMENT fields are supported by default:
| Field | Description |
|---|---|
| UID | Unique identifier of the requirement |
| LEVEL | Define section/requirement Level numbering |
| STATUS | Status of the requirement, e.g. Draft, Active, Deleted |
| TAGS | Tags of the requirement (comma separated AlphaNum words) |
| TITLE | Title of the requirement |
| STATEMENT | The statement of the requirement. The field can be single-line or multiline. |
| RATIONALE | The rationale of the requirement. The field can be single-line or multiline. |
| COMMENT | Comments to the rationale. The field can be single-line or multiline. Note: Multiple comment fields are possible. |
| RELATIONS | List of requirement relations. |
Currently, all [REQUIREMENT]'s fields are optional but at least either the STATEMENT field or the TITLE field must be present.
6.2.3. Composite nodes
A composite node is similar to a regular leaf node, but it can also nest other nodes.
This element can be useful in lower-level specification documents where a given section must describe a single feature, and the description requires one or more levels of nesting. In such cases, it may be natural to use a composite node that is tightly connected to several related sub-nodes.
The [[SECTION]] element is a reserved composite node in StrictDoc's default grammar, used to represent nested document sections or chapters. Users can also define custom composite nodes by registering them in the document grammar as follows:
[GRAMMAR]
ELEMENTS:
- TAG: COMPOSITE_REQUIREMENT
  PROPERTIES:
    IS_COMPOSITE: True
  FIELDS:
  - TITLE: MID
    TYPE: String
    REQUIRED: False
  - TITLE: UID
    TYPE: String
    REQUIRED: False
  - TITLE: STATEMENT
    TYPE: String
    REQUIRED: True

[[COMPOSITE_REQUIREMENT]]
STATEMENT: Statement

[REQUIREMENT]
STATEMENT: Substatement #1

[REQUIREMENT]
STATEMENT: Substatement #2

[REQUIREMENT]
STATEMENT: Substatement #3

[[/COMPOSITE_REQUIREMENT]]
Note
Composite requirements should not be used in every document. In most cases, a simple combination of nested [[SECTION]] and [[REQUIREMENT]] elements is sufficient. See also 🔗 21. Portability considerations.
6.2.3.1. SECTION
Warning
As of 2025 Q2, StrictDoc is switching to a new [[SECTION]] syntax for declaring sections (previously [SECTION]). If you are an existing user, please follow the migration guide 🔗 26.2. [[NODE]] migration (2025 Q2-Q3).
The [[SECTION]] element can used for creating document chapters and grouping requirements into logical groups. It is equivalent to the use of #, ##, ###, etc., in Markdown and ====, ----, ~~~~ in RST.
[DOCUMENT]
TITLE: StrictDoc

[[SECTION]]
TITLE: High-level requirements

[REQUIREMENT]
UID: HIGH-001
STATEMENT: ...

[[/SECTION]]

[[SECTION]]
TITLE: Implementation requirements

[REQUIREMENT]
UID: IMPL-001
STATEMENT: ...

[[/SECTION]]
6.2.3.1.1. Nesting sections
Sections can be nested within each other.
[DOCUMENT]
TITLE: StrictDoc

[[SECTION]]
TITLE: Chapter

[[SECTION]]
TITLE: Subchapter

[REQUIREMENT]
STATEMENT: ...

[[/SECTION]]

[[/SECTION]]
StrictDoc creates section numbers automatically. In the example above, the sections will have their titles numbered accordingly: 1 Chapter and 1.1 Subchapter.
6.2.3.1.2. Section grammar definition
The [[SECTION]] element is registered by default in StrictDoc's grammar, but users can override this declaration by defining it manually in the grammar specification. See 🔗 6.3. Document grammar.
Default [[SECTION]] grammar is equivalent to the following manual definition:
[GRAMMAR]
ELEMENTS:
- TAG: SECTION
  PROPERTIES:
    IS_COMPOSITE: True
    PREFIX: None
    VIEW_STYLE: Narrative
  FIELDS:
  - TITLE: MID
    TYPE: String
    REQUIRED: False
  - TITLE: UID
    TYPE: String
    REQUIRED: False
  - TITLE: LEVEL
    TYPE: String
    REQUIRED: True
  - TITLE: PREFIX
    TYPE: String
    REQUIRED: True
  - TITLE: TITLE
    TYPE: String
    REQUIRED: True
A user can add any custom field to the grammar declaration. However, the default set of fields typically covers most use cases.
6.2.4. Reserved fields
While it is possible to declare a grammar with completely custom fields, there is a fixed set of reserved fields that StrictDoc uses for the presentation of the table of contents and the document structure:
| Reserved field | Description |
|---|---|
| MID | Requirement's machine identifier. |
| UID | Requirement's UID. |
| LEVEL | Controls whether a node gets an automatic number in TOC or not. See 🔗 6.2.4.3. LEVEL. |
| STATUS | Currently, only has an effect on the Project Statistics screen which shows the Requirement Status breakdown statistics. |
| TITLE | Requirement's title. StrictDoc relies on this field to create document structure and table of contents. |
| STATEMENT | Requirement's statement. StrictDoc presents this field as a long text block. |
| COMMENT | One or more comments to a requirement. |
| RATIONALE | The rationale for a requirement. Visually presented in the same way as a comment. |
| RELATIONS (previously REFS) | StrictDoc relies on this field to link requirements together and build traceability information. This field must be declared after all other fields of a node. Note: The REFS field is deprecated and replaced with RELATIONS. |
6.2.4.1. MID – Machine identifier
StrictDoc supports the automatic generation of machine identifiers (MIDs). This optional feature can be enabled individually for each document through the document-level ENABLE_MID config option. If the MIDs are enabled, the document must also provide an explicit grammar for its nodes (see 🔗 6.3. Document grammar) because the default grammar does not include the MID identifier for its default TEXT and REQUIREMENT elements. All grammar elements must include the MID field.
[DOCUMENT]
TITLE: Hello World!
OPTIONS:
  ENABLE_MID: True

[GRAMMAR]
ELEMENTS:
- TAG: TEXT
  FIELDS:
  - TITLE: MID
    TYPE: String
    REQUIRED: True
  - TITLE: STATEMENT
    TYPE: String
    REQUIRED: True
- TAG: REQUIREMENT
  FIELDS:
  - TITLE: MID
    TYPE: String
    REQUIRED: True
  - TITLE: UID
    TYPE: String
    REQUIRED: True
  - TITLE: TITLE
    TYPE: String
    REQUIRED: True
  - TITLE: STATEMENT
    TYPE: String
    REQUIRED: True
When the ENABLE_MID option is enabled, StrictDoc automatically generates MID fields whenever the document is written back to the file system.
With the web server, MIDs are generated automatically when a document, section, or requirement is saved.
With the command-line interface, the generation of MID can be initiated with a export command. Executing strictdoc export --formats sdoc on a document with ENABLE_MID: True results in all nodes having auto-generated MIDs.
Note
StrictDoc provides the ENABLE_MID option on a per-document basis because this allows for the integration of MID-enabled documents alongside third-party documents where the MID feature may not be necessary or possible.
Markdown documents
For Markdown documents, the ENABLE_MID behavior is activated automatically — no document-level option is required. Instead, the presence of a MID field in a custom grammar element is the activation signal.
When a .gra.md grammar file declares a MID field for an element type, the Markdown writer automatically inserts a machine identifier for every node of that type that does not already have one. On the next read, the persisted value is treated as permanent.
Example grammar with MID declared:
# StrictDoc Markdown Grammar

## Element: REQUIREMENT

### Field: MID

**Type**: String
**Required**: False

### Field: UID

**Type**: String
**Required**: False

### Field: STATEMENT

**Type**: String
**Required**: False
With this grammar attached (**Grammar**: requirements.gra.md), any REQUIREMENT node that does not yet have a **MID** field will receive one on the first write-back.
6.2.4.1.1. Unique vs machine identifiers (MID vs UID)
Machine identifiers (MIDs) differ from and do not replace unique identifiers (UIDs). A requirement, section, or document node may have both MID and UID fields defined. For example:
[REQUIREMENT]
MID: 06ab121d3c0f4d8c94652323b8f735c6
UID: SDOC-SSS-70
STATUS: Active
TITLE: Move nodes between documents
STATEMENT: >>>
The Requirements Tool shall allow moving nodes (sections, requirements) between documents.
<<<
Advantages of using machine identifiers:
- Machine identifiers provide a robust means of identifying documents, sections, requirements, or custom nodes. An MID can uniquely identify a given node, independent of other fields like UID or TITLE.
- MIDs increase the portability of requirements data. Even when UID naming conventions change or nodes are relocated, the MID continues to uniquely identify the original node.
- The unique identification of nodes via MIDs allows precise tracking of changes using StrictDoc's Diff/Changelog functionality. It allows the algorithm to accurately match requirements, sections, or document nodes, even if they are moved, renamed, or undergo metadata changes.
For larger projects, particularly those with extended maintenance cycles, we strongly recommend activating machine identifiers early in the project lifecycle. This proactive approach ensures robust tracking and management of documentation throughout the project's duration.
6.2.4.2. UID
Unique identifier of the requirement.
StrictDoc does not impose any limitations on the format of a UID. Examples of typical conventions for naming UIDs:
- REQ-001, SCA-001 (scalability), PERF-001 (performance), etc.
- cES1008, cTBL6000.1 (example from NASA cFS requirements)
- Requirements without a number, e.g. SDOC-HIGH-DATA-MODEL (StrictDoc)
- SAVOIR.OBC.PM.80 (SAVOIR guidelines)
[DOCUMENT]
TITLE: StrictDoc

[REQUIREMENT]
UID: SDOC-HIGH-DATA-MODEL
STATEMENT: StrictDoc shall be based on a data model.
Observation
Some documents do not use unique identifiers which makes it impossible to trace their requirements to each other. Within StrictDoc's framework, it is assumed that a good requirements document has all of its requirements uniquely identifiable, however, the UID field is optional to accommodate for documents without connections between requirements.
6.2.4.3. LEVEL
A section can have no level attached to it. To enable this behavior, the field LEVEL has to be set to None.
[DOCUMENT]
TITLE: Hello world doc

[[SECTION]]
TITLE: Section 1

[[/SECTION]]

[[SECTION]]
LEVEL: None
TITLE: Out-of-band Section

[[/SECTION]]

[[SECTION]]
TITLE: Section 2

[[/SECTION]]
The section with no level will be skipped by StrictDoc's system of automatic numbering of the section levels (1, 1.1, 1.2, 2, ...).
The behavior of the LEVEL: None option is recursive. If a parent section has its LEVEL set to None, all its subsections' and requirements' levels are set to LEVEL: None by StrictDoc automatically.
6.2.4.4. STATUS
6.2.4.5. TAGS
Allows to add tags to a [REQUIREMENT]. Tags are a comma separated list of single words. Only Alphanumeric tags (a-z, A-Z, 0-9 and underscore) are supported.
6.2.4.6. TITLE
The title of the requirement. Every requirement should have its TITLE field specified.
Observation
Many real-world documents have requirements with statements and titles but some documents only use statements without title in which case their UID becomes their TITLE and vice versa.
Example:
[DOCUMENT]
TITLE: StrictDoc

[REQUIREMENT]
UID: REQ-001
STATEMENT: StrictDoc shall enable requirements management.
6.2.4.7. STATEMENT
The statement of the requirement. The field can be single-line or multiline. Every requirement shall have its STATEMENT field specified.
6.2.4.8. RATIONALE
A requirement should have a RATIONALE field that explains/justifies why the requirement exists. Like comments, the rationale field can be single-line or multiline.
[DOCUMENT]
TITLE: StrictDoc

[REQUIREMENT]
UID: REQ-001
STATEMENT: StrictDoc shall enable requirements management.
COMMENT: Clarify the meaning or give additional information here.
RATIONALE: The presence of the REQ-001 is justified.
6.2.4.9. COMMENT
A requirement can have one or more comments explaining the requirement. The comments can be single-line or multiline.
[DOCUMENT]
TITLE: StrictDoc

[REQUIREMENT]
UID: REQ-001
STATEMENT: StrictDoc shall enable requirements management.
COMMENT: Clarify the meaning or give additional information here.
COMMENT: >>>
This is a multiline comment.

The content is split via \n\n.

Each line is rendered as a separate paragraph.
<<<
6.2.4.10. RELATIONS
The RELATIONS field is used to connect requirements to each other:
[DOCUMENT]
TITLE: StrictDoc

[REQUIREMENT]
UID: REQ-001
STATEMENT: StrictDoc shall enable requirements management.

[REQUIREMENT]
UID: REQ-002
TITLE: Requirement #2's title
STATEMENT: Requirement #2 statement
RELATIONS:
- TYPE: Parent
  VALUE: REQ-001
- TYPE: File
  VALUE: /full/path/file.py
The supported relation types are: Parent, Child, and File. To be used in a requirement, the relations must be first registered in the document grammar. The default grammar defines Parent and File relation. See 🔗 6.3.3. Relations for more details.
The RELATIONS must be the last field of a requirement. For TYPE: Parent and TYPE: Child relations, the VALUE attribute contains a parent/child's requirement UID. A requirement may reference multiple parent or child requirements by adding multiple TYPE/VALUE items. Defining circular references e.g. Req-A ⇒ Req-B ⇒ Reg-C ⇒ Req-A results in validation errors and must be avoided.
The TYPE: File-VALUE attribute contains a filename referencing the implementation of (parts of) this requirement. A requirement may add multiple file references requirements by adding multiple TYPE: File-VALUE items.
Note
In most requirements projects, only the Parent relations should be used, possibly with roles. The Child relation should be used only in specific cases. See 🔗 6.3.3.2. Parent vs Child relations for more details.
Note
In the near future, adding information about external references (e.g. company policy documents, technical specifications, regulatory requirements, etc.) is planned.
Warning
By design, StrictDoc will only show parent or child links if both requirements connected with a reference have UID defined.
6.2.4.10.1. Relation roles
A requirement relation can be specialized with a role. The role must be registered in the document grammar, see 🔗 6.3.3. Relations.
[DOCUMENT]
TITLE: Example

[GRAMMAR]
ELEMENTS:
- TAG: REQUIREMENT
  FIELDS:
  - TITLE: UID
    TYPE: String
    REQUIRED: True
  - TITLE: TITLE
    TYPE: String
    REQUIRED: True
  - TITLE: STATEMENT
    TYPE: String
    REQUIRED: True
  RELATIONS:
  - TYPE: Parent
    ROLE: Refines

[REQUIREMENT]
UID: REQ-2
TITLE: Requirement title
STATEMENT: >>>
Requirement statement.
<<<
RELATIONS:
- TYPE: Parent
  VALUE: REQ-1
  ROLE: Refines
In this example REQ-1 is the parent of REQ-2 and REQ-2 refines REQ-1.
The reverse name of a role, if needed, is configured in the grammar with REVERSE_ROLE. It is not repeated in individual requirement relations. See 🔗 6.3.3.1. Relation roles for the grammar syntax.
6.2.5. Single vs multiline fields
For each node field, StrictDoc supports both single-line and multiline fields.
Example:
[NODE]
TITLE: Single-line field
STATEMENT: >>>
Multiline field.
<<<
The following summarizes the current StrictDoc convention for using single-line vs. multiline fields:
In the default and most common use case, single-line fields are used for meta-information such as MID, UID, TITLE, TAGS, etc. Multiline fields are used for the actual document or requirement content such as STATEMENT, RATIONALE, COMMENT, and similar fields.
Single-line fields are parsed as plain text, not as RST. To render RST or to have [LINK: ...] recognized as HTML, the field must be multiline.
By convention, each node contains one primary multiline field: STATEMENT, CONTENT or DESCRIPTION. All fields before the primary multiline field should be single-line fields that store meta-information, and all fields after the primary multiline field should typically be multiline content.
A fallback to this rule applies when a node does not have a content field, in which case the TITLE field serves as a boundary between single-line and multiline fields. If a node has neither a content field nor a TITLE field, all fields are treated as multiline.
There is an ongoing discussion on GitHub about formalizing the single-line and multiline convention in the SDoc format: https://github.com/strictdoc-project/strictdoc/discussions/2221. User feedback is welcome.
6.2.6. DOCUMENT_FROM_FILE – Composing documents from other documents
Note
The composable documents is an early feature with only 50%+ of the implementation complete. See Epic: UI: Composable documents for an overview of the aspects that are still missing.
StrictDoc .sdoc files can be built-up from including other documents where a document can be included to no more than one including document.
The [DOCUMENT_FROM_FILE] element can be used anywhere body elements can be used (e.g. [SECTION], [REQUIREMENT], [TEXT] etc.) and will evaluate by inserting its contents from the file referenced by its FILE: property where it was used in the parent document. The files included must be proper SDoc documents and have a usual .sdoc extension.
Here is an example pair of files similar to examples above. First the .sdoc file has a [DOCUMENT_FROM_FILE] that references the latter file.
[DOCUMENT]
TITLE: StrictDoc

[DOCUMENT_FROM_FILE]
FILE: include.sdoc

[TEXT]
STATEMENT: >>>
This text is in the main document.
<<<
Then the referenced file, include.sdoc:
[DOCUMENT]
TITLE: Section ABC

[TEXT]
STATEMENT: >>>
This text is in the included document.
<<<
Which will resolve to the following document after inclusion:
[DOCUMENT]
TITLE: StrictDoc

[[SECTION]]
TITLE: Section ABC

[TEXT]
STATEMENT: >>>
This text is in the included document.
<<<

[TEXT]
STATEMENT: >>>
This text is in the main document.
<<<
Note
The Composable Documents feature belongs to the list of features that may be less portable when it comes to interfacing with other tools. See 🔗 21. Portability considerations.
The SDoc model and syntax provide a set of default elements, along with the option for users to create custom nodes.
The default leaf nodes are [TEXT] and [REQUIREMENT], while the default composite node is [[SECTION]]. These default nodes are described below.
To create a custom node, users must declare it in a document grammar. Instructions for creating grammars are provided in 🔗 6.3. Document grammar.
6.3. Document grammar
Observation
Different industries have their own types of requirements documents with specialized meta information. Examples: ASIL in the automotive industry or HERITAGE field in some of the requirements documents by NASA.
For anything beyond a small project, it's best to define a document grammar early. The default implicit document grammar works for quick tests, but real projects often need extra fields or custom node types. Starting with your own grammar saves time later. The instructions for defining a document grammar follow below.
StrictDoc allows declaration of document grammars with custom fields that are specific to a particular document.
First, such fields have to be registered on a document level using the [GRAMMAR] field. The following example defines a grammar with three elements: SECTION, TEXT, and REQUIREMENT, where the REQUIREMENT element includes several custom fields, such as the VERIFICATION field.
[DOCUMENT]
TITLE: How to declare a document grammar

[GRAMMAR]
ELEMENTS:
- TAG: SECTION
  PROPERTIES:
    IS_COMPOSITE: True
    PREFIX: None
    VIEW_STYLE: Narrative
  FIELDS:
  - TITLE: MID
    TYPE: String
    REQUIRED: False
  - TITLE: UID
    TYPE: String
    REQUIRED: False
  - TITLE: LEVEL
    TYPE: String
    REQUIRED: True
  - TITLE: PREFIX
    TYPE: String
    REQUIRED: True
  - TITLE: TITLE
    TYPE: String
    REQUIRED: True
- TAG: TEXT
  FIELDS:
  - TITLE: UID
    TYPE: String
    REQUIRED: False
  - TITLE: STATEMENT
    TYPE: String
    REQUIRED: True
- TAG: REQUIREMENT
  FIELDS:
  - TITLE: UID
    TYPE: String
    REQUIRED: True
  - TITLE: VERIFICATION
    TYPE: String
    REQUIRED: True
  - TITLE: TITLE
    TYPE: String
    REQUIRED: True
  - TITLE: STATEMENT
    TYPE: String
    REQUIRED: True
  - TITLE: COMMENT
    TYPE: String
    REQUIRED: True
This declaration configures the parser to recognize the declared fields as defined by a user. Declaring a special field as REQUIRED: True makes this field mandatory for each and every requirement in the document.
When the fields are registered on the document level, it becomes possible to declare them as the [REQUIREMENT] special fields:
[REQUIREMENT]
UID: ABC-123
VERIFICATION: Test
STATEMENT: System A shall do B.
COMMENT: Test comment.
Each grammar element must have exactly one content field named STATEMENT, DESCRIPTION or CONTENT. The content field plays a key role in the HTML user interface as well as other export formats.
All fields before the content field are considered meta information. Meta information fields are assumed to be single-line. The content field and all following fields accept single-line and multiline strings. See 🔗 6.2.5. Single vs multiline fields for more details.
Note
The order of fields in each document node must match the order of their declaration in the grammar.
6.3.1. Supported field types
The supported field types are:
| Field type | Description |
|---|---|
| String | Simple String |
| SingleChoice | Enum-like behavior, one choice is possible. Must be single-line and thus has to be defined before the content field. |
| MultipleChoice | comma-separated words with fixed options. Must be single-line and thus has to be defined before the content field. |
| Tag | comma-separated list of tags/key words. Only Alphanumeric tags (a-z, A-Z, 0-9 and underscore) are supported. |
Note
The field type also influences how the field is presented in the web editor UI. A SingleChoice field enables an auto-completion function, which is useful in cases where the same values are entered repeatedly (such as requirement owners, test case types, or status fields).
Example:
[DOCUMENT]
TITLE: How to declare a grammar with different field types

[GRAMMAR]
ELEMENTS:
- TAG: TEXT
  FIELDS:
  - TITLE: UID
    TYPE: String
    REQUIRED: False
  - TITLE: STATEMENT
    TYPE: String
    REQUIRED: True
- TAG: REQUIREMENT
  FIELDS:
  - TITLE: UID
    TYPE: String
    REQUIRED: True
  - TITLE: ASIL
    TYPE: SingleChoice(A, B, C, D)
    REQUIRED: True
  - TITLE: VERIFICATION
    TYPE: MultipleChoice(Review, Analysis, Inspection, Test)
    REQUIRED: True
  - TITLE: UNIT
    TYPE: Tag
    REQUIRED: True
  - TITLE: TITLE
    TYPE: String
    REQUIRED: True
  - TITLE: STATEMENT
    TYPE: String
    REQUIRED: True
  - TITLE: COMMENT
    TYPE: String
    REQUIRED: True
    REQUIRED: True
  RELATIONS:
  - Type: Parent
  - Type: File

[TEXT]
STATEMENT: >>>
This document is an example of a simple SDoc custom grammar.
<<<

[REQUIREMENT]
UID: ABC-123
ASIL: A
VERIFICATION: Review, Test
UNIT: OBC, RTU
TITLE: Function B
STATEMENT: System A shall do B.
COMMENT: Test comment.
RELATIONS:
- TYPE: Parent
  VALUE: REQ-001
- TYPE: File
  VALUE: /full/path/file.py
6.3.2. Grammar element properties
6.3.2.1. IS_COMPOSITE
The IS_COMPOSITE property controls whether a document node will be treated as a leaf node, e.g., [NODE], or a composite node, e.g., [[NODE]].
[GRAMMAR]
ELEMENTS:
- TAG: NODE
  PROPERTIES:
    IS_COMPOSITE: False
  FIELDS:
  - TITLE: TITLE
    TYPE: String
    REQUIRED: True
- TAG: COMPOSITE_NODE
  PROPERTIES:
    IS_COMPOSITE: True
  FIELDS:
  - TITLE: TITLE
    TYPE: String
    REQUIRED: True

[NODE]
TITLE: Leaf node

[[COMPOSITE_NODE]]
TITLE: Composite node

[[/COMPOSITE_NODE]]
Note
See 🔗 6.2.2. Leaf nodes and 🔗 6.2.3. Composite nodes for a general description of leaf vs composite nodes.
6.3.2.2. PREFIX
The PREFIX property declared for a grammar element determines the prefix that will be automatically added to a UID when creating a new requirement via the StrictDoc web interface or the manage auto-uuid command.
[GRAMMAR]
ELEMENTS:
- TAG: REQUIREMENT
  PROPERTIES:
    PREFIX: REQ-
  FIELDS:
  - TITLE: TITLE
    TYPE: String
    REQUIRED: True
  - TITLE: STATEMENT
    TYPE: String
    REQUIRED: True
6.3.2.3. VIEW_STYLE
The VIEW_STYLE property controls which template should be used for rendering a given node.
[GRAMMAR]
ELEMENTS:
- TAG: REQUIREMENT
  PROPERTIES:
    VIEW_STYLE: Narrative
  FIELDS:
  - TITLE: STATEMENT
    TYPE: String
    REQUIRED: True
If VIEW_STYLE is not specified at the grammar element level, StrictDoc will look up the view style from the VIEW_STYLE document-level declaration, see 🔗 6.2.1.1.4. VIEW_STYLE.
6.3.3. Relations
The custom grammar configuration includes the optional RELATION: section which specifies the relations a given document supports.
[DOCUMENT]
TITLE: Test Doc

[GRAMMAR]
ELEMENTS:
- TAG: REQUIREMENT
  FIELDS:
  - TITLE: STATEMENT
    TYPE: String
    REQUIRED: True
  RELATIONS:
  - TYPE: Parent

[REQUIREMENT]
STATEMENT: >>>
This is a statement.
<<<
RELATIONS:
- TYPE: Parent
  VALUE: ID-001
The supported relation types are Parent, Child, File. The Parent/Child relations are valid between requirements, the File relation connects a requirement with a file.
The default grammar relations, when a custom grammar is not specified, are Parent and File.
6.3.3.1. Relation roles
StrictDoc's custom grammar support the configuration of relation roles. The Parent and Child relations can be further specialized with roles, such as Refines, Implements, Verifies, etc.
[DOCUMENT]
TITLE: Test Doc

[GRAMMAR]
ELEMENTS:
- TAG: REQUIREMENT
  FIELDS:
  - TITLE: TITLE
    TYPE: String
    REQUIRED: True
  - TITLE: STATEMENT
    TYPE: String
    REQUIRED: True
  RELATIONS:
  - TYPE: Parent
    ROLE: Refines
With this grammar, StrictDoc will only allow creating requirements that have Parent relations with the ROLE: Refines specified. Any other relations will trigger validation errors.
Optionally, a role can define a reverse display name using REVERSE_ROLE:
[DOCUMENT]
TITLE: Test Doc

[GRAMMAR]
ELEMENTS:
- TAG: REQUIREMENT
  FIELDS:
  - TITLE: UID
    TYPE: String
    REQUIRED: True
  - TITLE: TITLE
    TYPE: String
    REQUIRED: True
  RELATIONS:
  - TYPE: Parent
    ROLE: Refines
    REVERSE_ROLE: Refined by

[REQUIREMENT]
UID: REQ-1
TITLE: Parent requirement

[REQUIREMENT]
UID: REQ-2
TITLE: Child requirement
RELATIONS:
- TYPE: Parent
  VALUE: REQ-1
  ROLE: Refines
In this example, REQ-2 has a Parent relation to REQ-1 with ROLE: Refines. When the relation is displayed from REQ-2 to REQ-1, StrictDoc shows Refines. When the same relation is displayed from REQ-1 back to REQ-2, StrictDoc shows Refined by.
The REVERSE_ROLE field is only defined in the grammar. Individual requirement relations still specify only the canonical ROLE. The REVERSE_ROLE field cannot be used without ROLE. If REVERSE_ROLE is omitted, StrictDoc displays ROLE in both directions.
Note
See also 🔗 11.4. File relations roles.
6.3.3.2. Parent vs Child relations
TL;DR If there is no compelling reason to use the Child relations, avoid using them.
Most of the technical requirements documents can be modeled with just a Parent relation type. A typical traceability graph for a requirements project is typically child-to-parent, where the higher-level parent requirements are referred to as "Parents" by their child requirements.
For example, in one (parent) document:
[REQUIREMENT]
UID: PARENT-1
TITLE: Parent requirement
STATEMENT: >>>
...
<<<
Somewhere in another child document:
[REQUIREMENT]
UID: CHILD-1
TITLE: Child requirement
STATEMENT: >>>
...
<<<
RELATIONS:
- TYPE: Parent
  VALUE: PARENT-001
In some very special cases, it may be desired to also use the Child relations. For example, creating a so-called Compliance Matrix between a standard and a project requirement can use the Child relation to connect both the upper-level standard requirement with a project-level technical requirement:
[DOCUMENT]
TITLE: Standard X Compliance Matrix

[GRAMMAR]
ELEMENTS:
- TAG: REQUIREMENT
  FIELDS:
  - TITLE: COMPLIANCE
    TYPE: String
    REQUIRED: True
  - TITLE: TITLE
    TYPE: String
    REQUIRED: True
  - TITLE: STATEMENT
    TYPE: String
    REQUIRED: True
  RELATIONS:
  - TYPE: Parent
  - TYPE: Child

[REQUIREMENT]
COMPLIANCE: Compliant.
TITLE: STANDARD-001
STATEMENT: >>>
This is a compliance statement regarding the Standard X's STANDARD-001 requirement...
<<<
RELATIONS:
- TYPE: Parent
  VALUE: STANDARD-001
- TYPE: Child
  VALUE: PROJECT-001
With such a setup, StrictDoc generates the correct traceability graph that will link together the requirements of the PROJECT with the requirements of the STANDARD through the requirements of the compliance matrix.
Another example can be adapting the requirements of the Off-the-Shelf (OTS) project to the higher-level requirements of the user project. An intermediate requirements document can be created that connects the parent requirements of the user project with the immutable child requirements of the OTS project. This intermediate document can link the user requirement with the Parent and the OTS project with a Child link.
Both examples above involve an activity called "tailoring" in which an intermediate document (the Compliance Matrix) serves as an interface between two layers of documents. Tailoring means that a user may implement only a subset of a standard and explicitly specify which requirements are implemented, which are not, and where deviations from the standard occur.
6.3.4. IMPORT_FROM_FILE – Importing grammar from file
A document grammar can be described in a separate file with an extension .sgra and imported to a document. This feature may be useful when multiple documents need to share the same grammar.
Example:
[DOCUMENT]
TITLE: Document 1

[GRAMMAR]
IMPORT_FROM_FILE: grammar.sgra

[REQUIREMENT]
TITLE: Requirement title
STATEMENT: >>>
Requirement statement.
<<<
A grammar file has an extension grammar.sgra and contains a usual grammar declaration which starts with a [GRAMMAR] tag.
[GRAMMAR]
ELEMENTS:
- TAG: REQUIREMENT
  FIELDS:
  - TITLE: TITLE
    TYPE: String
    REQUIRED: True
  - TITLE: STATEMENT
    TYPE: String
    REQUIRED: True
When a [GRAMMAR] is declared with an IMPORT_FROM_FILE line, the grammar from the grammar file becomes the document grammar as if it was declared directly in the document.
Note
Editing of the grammars defined in .sgra files can be only done with a text editor, it is not implemented yet in the editable web interface.
6.3.4.1. Grammar aliases
To support sharing a grammar across multiple documents, possibly located in different directories, a grammar alias can be used as follows:
[DOCUMENT]
TITLE: Hello world

[GRAMMAR]
IMPORT_FROM_FILE: @my_grammar
The grammar alias itself must be registered in the project config:
from strictdoc.core.project_config import ProjectConfig


def create_config() -> ProjectConfig:
    config = ProjectConfig(
        project_title="StrictDoc Documentation",
        project_features=[
            # Intentionally nothing.
        ],
        grammars={
            "@my_grammar": "grammar.sgra",
        },
    )
    return config
The grammar path must be specified relative to the directory containing the project configuration file.
6.4. Links
StrictDoc supports creating inline links to document sections, anchors, requirements and custom grammar elements.
6.4.1. Links
Elements that have a UID can be referenced from any node’s multiline field using a [LINK: <UID>] tag.
Example:
The following link references a section: 🔗 6.4. Links.
A LINK tag has an optional link title: [LINK: <UID>, <link title>]. The link shows the link title instead of the title of the linked node or anchor. A link with a link title has no 🔗 prefix. As a result, the link reads as part of a sentence.
An unquoted link title cannot contain , or ]. Enclose a link title with these characters in double quotes. An [ANCHOR: ...] title follows the same rule.
Example:
This sentence contains a link with a custom title.
Note
Adding a LINK tag only works when it is placed in multiline fields written with >>>...<<<. Single-line fields do not support RST syntax or tags such as [LINK:...]. See also: 🔗 6.2.5. Single vs multiline fields.
6.4.2. Anchors
The [ANCHOR: <anchor uid>, <optional anchor title>] tag creates an anchor that can be referenced from other pages using [LINK <Anchor UID>].
The optional title can be an unquoted string, but must be enclosed in double quotes if it contains special characters.
Example:
This is a link to anchor: 🔗 Anchor ABC.
Note
ANCHOR is a block-level tag. It has to be placed in the beginning of a line with a newline break after the tag.
6.4.2.1. Anchor example
This section contains an anchor named Anchor ABC.
6.5. Syntax rules
6.5.1. Strict rule #1: One empty line between all nodes
StrictDoc's grammar requires each node, such as [REQUIREMENT], [[SECTION]], etc., to be separated with exactly one empty line from the nodes surrounding it. This rule is valid for all nodes. Absence of an empty line or presence of more than one empty line between two nodes will result in an SDoc parsing error.
6.5.2. Strict rule #2: No content is allowed outside of SDoc grammar
StrictDoc's grammar does not allow any content to be written outside the SDoc grammatical constructs.
It is assumed that the critical content shall always be written in form of leaf nodes and composite nodes, such as [REQUIREMENT] and [[SECTION]].
Non-critical content shall be specified using the [TEXT] leaf nodes.
6.5.3. Strict rule #3: No empty strings
StrictDoc's grammar does not allow empty strings. This rule is applicable to both single-line and multiline strings and both section fields and requirement fields. A field is either missing or is a non-empty string.
The following patterns are all invalid for single-line fields:
[[SECTION]]
TITLE:

[[SECTION]]
TITLE: (any number of space characters after colons)

[REQUIREMENT]
STATEMENT:

[REQUIREMENT]
STATEMENT: (any number of space characters after colons)
The following patterns are all invalid for multiline fields:
[REQUIREMENT]
COMMENT: >>>
<<<

[REQUIREMENT]
COMMENT: >>>
(any number of space characters)
<<<
If you need to provide a placeholder for a field that you know has to be filled out soon, add a "TBD" (to be done, by our team) or a "TBC" (to be confirmed with a customer or a supplier) string.
The Project Statistics screen provides metrics for counting the number of TBDs (To Be Determined) and TBCs (To Be Confirmed) in a document, assisting in evaluating the document's maturity. This is a common practice in the regulared industries. See 🔗 14. Project statistics screen for more details.
7. Markup
The Restructured Text (reST) markup is the default markup supported by StrictDoc. The reST markup can be written inside all StrictDoc's text blocks, such as STATEMENT, COMMENT, RATIONALE, etc.
See the reST syntax documentation for a full reference.
Note
StrictDoc supports a Docutils-subset of RST, not a Sphinx-subset. See 🔗 24.1. Limitations of RST support by StrictDoc.
The support of Tex and HTML is planned.
7.1. Images
To insert an image into a document, create a folder named _assets alongside your document and then place the image file into it.
This is the example of how images are included using the reST syntax:
[TEXT]
STATEMENT: >>>
.. image:: _assets/sandbox1.svg
   :alt: Sandbox demo
   :class: image
<<<
Note
When editing a requirement or text block in the Web UI, you can drag and drop image files into a multiline field or paste an image from the clipboard. StrictDoc uploads the files to the document's _assets directory and inserts references using the configured document markup.
7.1.1. Wildcard image paths for RST/Sphinx export
StrictDoc extends the RST image directive with wildcard-based paths for documents exported to RST/Sphinx:
[TEXT]
STATEMENT: >>>
.. image:: _assets/diagram.*
<<<
A wildcard path allows Sphinx to select the image format for each output format. For example, Sphinx can use diagram.svg for HTML output and diagram.png for LaTeX/PDF output.
Store both files in the same directory with the same filename stem. Replace the file extension in the image directive with *, as shown above.
In documents configured to use RST markup, the Web UI creates the wildcard path when an upload completes a vector and raster pair. If the field already contains a direct reference to one file, the editor replaces that path without moving the image directive.
In documents configured to use HTML or Markdown markup, the Web UI inserts a direct reference to each uploaded file. It does not use wildcard image paths.
7.2. Mathjax support
StrictDoc includes the MathJax Javascript library in all document templates by default. No configuration is required to use MathJax.
Examples of using MathJax:
[TEXT]
STATEMENT: >>>
The following fragment will be rendered with MathJax:

.. raw:: latex html
    $$
    \mathbf{\underline{k}}_{\text{a}} =
    \mathbf{\underline{i}}_{\text{a}} \times
    \mathbf{\underline{j}}_{\text{a}}
    $$
<<<
Sphinx-style syntax is also supported:
[TEXT]
STATEMENT: >>>
The following formula :math:`a^2 + b^2 = c^2` is rendered inline with the text.

When using the math directive, the enclosing $$ are not required.

.. math::
    \mathbf{\underline{k}}_{\text{a}} =
    \mathbf{\underline{i}}_{\text{a}} \times
    \mathbf{\underline{j}}_{\text{a}}
>>>
See 🔗 17.1.11. Selecting features for the description of other features.
8. Export formats
8.1. HTML documentation tree by StrictDoc
This is a default export option supported by StrictDoc.
The following command creates an HTML export:
strictdoc export docs/ --formats=html --output-dir output-html
Example
This documentation is exported by StrictDoc to HTML: StrictDoc HTML export
The options --formats=html and --output-dir output-html can be skipped because HTML export is a default export option and the default output folder is output.
StrictDoc does not detect .sdoc files in the output folder. This is based on the assumption that StrictDoc should not read anything in the output folder, which is intended for transient output artifacts.
8.1.1. Inbound Links
To enable integration of StrictDoc with external tools such as bug trackers, project management systems, or wikis, StrictDoc supports stable inbound links to any node that has a UID.
To create a stable link, click the "Copy Stable Link" button located in the top-left corner of a requirement or section block:

The stable links have the form of a URL pointing to the project's main index page, followed by the UID (or MID) as an anchor. For example:
http://your-strictdoc-site/#SDOC_UG_HELLO_WORLD
http://your-strictdoc-site/#742831d32ca54791b53c1dbbbd070b55
When such a link is opened, StrictDoc automatically resolves the UID (or MID) and forwards the user to the appropriate page and position within the project. This allows requirements to be moved between sections or files without breaking external references.
8.2. HTML export via Sphinx
The following command creates an RST export:
strictdoc export YourDoc.sdoc --formats=rst --output-dir output
The created RST files can be copied to a project created using Sphinx, see Getting Started with Sphinx.
cp -v output/YourDoc.rst path/to/sphinx-project/source/
cd path/to/sphinx-project && make html
8.3. PDF export via Sphinx/LaTeX
The following command creates an RST export:
strictdoc export YourDoc.sdoc --formats=rst --output-dir output
The created RST files can be copied to a project created using Sphinx, see Getting Started with Sphinx.
cp -v output/YourDoc.rst path/to/sphinx-project/source/
cd path/to/sphinx-project && make latexpdf
Building the PDF requires a LaTeX toolchain (for example, xelatex) to be installed. For a self-contained way to generate PDFs directly from StrictDoc without Sphinx/LaTeX, see the 🔗 23.5. HTML2PDF document generator section.
8.4. JSON
The following command creates a JSON export:
strictdoc export YourDoc.sdoc --formats=json --output-dir output/
The structure of the exported JSON mostly mirrors the structure of the underlying SDoc objects that represent the project tree, documents, sections, requirements, and other nodes.
When the exported documents are included to other documents using the 🔗 6.2.6. DOCUMENT_FROM_FILE – Composing documents from other documents feature, the JSON export does not include the included documents but only the including documents with the included content. This can be changed by adding the --included-documents option.
9. Manage project tree
9.1. Automatic assignment of requirements UID
To assign requirement UIDs automatically:
strictdoc manage auto-uid <path-to-project-tree>
The command goes over all requirements in the project tree and assigns missing UIDs automatically. The project tree is mutated in-place.
By default, the assignment happens based on the requirement mask REQ-, so the requirements will get the UIDs of REQ-001, REQ-002, ...
If a document-level or a section-level requirement mask is provided, the UIDs will be generated based on that mask.
A document-level requirement mask:
[DOCUMENT]
TITLE: Hello world doc
PREFIX: MYDOC-
A section-level requirement mask:
[[SECTION]]
TITLE: Section 2.
PREFIX: LEVEL2-REQ-
9.2. Creating a new node
To create a new node in a document:
strictdoc manage new <path-to-project-tree>
The command adds a new node at the end of the target document. The node receives a unique MID and the next available UID for its document. Required fields (as defined by the document grammar) are set to TBD; non-required fields are left empty.
StrictDoc reads all documents in the project tree before creating the node so that the generated UID does not collide with UIDs in any other document.
Selecting the target document
When the project tree contains more than one document, use --document-path to specify which document to add the node to:
strictdoc manage new <path-to-project-tree> --document-path <path-to-document>
Selecting the parent node
Use --parent-uid-or-mid to add the new node inside an existing document or composite (section) node:
strictdoc manage new <path-to-project-tree> --parent-uid-or-mid <uid-or-mid>
Both options can be combined. When both are given, StrictDoc validates that the specified parent node is actually present in the specified document.
Selecting the node type
Use --node-type to specify which grammar element type the new node should use:
strictdoc manage new <path-to-project-tree> --node-type <TYPE>
The value must match a grammar element tag defined in the document (for example REQUIREMENT, FEATURE, or any custom type). If the type does not exist in the grammar, the command exits with an error listing the available types.
When --node-type is omitted, manage new applies the following default:
- If the document has no explicit grammar, or its grammar includes a REQUIREMENT element, the node type defaults to REQUIREMENT.
- If the document has a custom grammar with no REQUIREMENT element, the command exits with an error and asks the user to specify --node-type.
10. Format project tree
The strictdoc format command reads all SDoc and Markdown documents in the project tree and writes them back formatted according to the project's document_line_width configuration option.
strictdoc format <path-to-project-tree>
The command performs in-place formatting: all documents are rewritten at their original paths.
The document_line_width option must be configured in the project config to have an effect. If it is not set, the command still rewrites all documents but without applying any line-width changes (a normalizing round-trip).
Configuring the line width
To enable automatic line-width formatting, set document_line_width in the project config:
from strictdoc.core.project_config import ProjectConfig


def create_config() -> ProjectConfig:
    config = ProjectConfig(
        document_line_width=80,
    )
    return config
The minimum acceptable value is 80. When set, the SDoc and Markdown writers wrap long text paragraphs to the configured width. Structured content such as bullet lists, numbered lists, indented code blocks, RST directives, and Markdown fenced code blocks are left unchanged.
Integration with the web interface
When document_line_width is configured, the web server also applies the line-width limit when saving node edits back to the file system.
11. Traceability between requirements and source code
StrictDoc allows connecting requirements to source code files in two ways:
- Linking source files to requirements by adding special markers in the source code without modifying the requirements.
- Linking requirements to source files by adding relations in the requirements without altering the source code.
The advantage of the first approach is that requirements remain agnostic to the source code and implementation details. Special markers are added solely to the source files, creating traceability back to the requirements.
The benefit of the second approach is that traceability to source files is established without any modification to the source code. This can be useful in projects where adding markers to the source code is undesirable or not feasible.
Both options can be used independently or in combination, depending on the project setup and allocation of software components.
To activate the traceability to source files, configure the project config with a dedicated feature:
from strictdoc.core.project_config import ProjectConfig


def create_config() -> ProjectConfig:
    config = ProjectConfig(
        project_features=[
            "REQUIREMENT_TO_SOURCE_TRACEABILITY"
        ],
    )
    return config
By default, StrictDoc looks for source files in a directory from which the strictdoc command is run. This can be changed by using the source_root_path project-level option.
See 🔗 17.1. Project-level configuration for more details about the project-level options.
The strictdoc-examples repository contains executable examples including the example of requirements-to-source-code traceability.
11.1. Language-aware parsing of source code
For parsing source code and calculating traceability to requirements, StrictDoc uses language-aware parsers for supported source file types. For other source file types, StrictDoc falls back to a general parser that is agnostic of specific programming languages and their constructs, such as classes or functions.
Language-aware parsing recognizes selected language syntax, primarily enabling traceability of functions (in Python, C/C++, Rust, and others), classes (in Python, C++, and others), and tests (Python, C++, Robot Framework) to requirements.
Language-aware parsing is enabled automatically for supported source file types when requirement-to-source traceability is enabled:
from strictdoc.core.project_config import ProjectConfig


def create_config() -> ProjectConfig:
    config = ProjectConfig(
        project_features=[
            "REQUIREMENT_TO_SOURCE_TRACEABILITY"
        ],
    )
    return config
11.2. Linking source code to requirements
To connect a source file to a requirement, a dedicated @relation marker must be added to the source file. Several marker types are supported, depending on the programming language. For example, the scope=class option is available for Python files but not for C files, as C does not support classes. The marker supports both () and {} for arguments.
Note
Language-specific scopes such as class and function are available for supported source file types. See 🔗 11.1. Language-aware parsing of source code.
It is also possible to use @relation markers and be compatible with Doxygen. See 🔗 22.1. Doxygen.
1) Linking a file to a requirement
The marker must be added to the top comment of a file.
"""
This file implements ...

@relation(REQ-1, scope=file)
"""
2) Linking a class to a requirement (Python only)
class Foo:
    """
    This class implements ...

    @relation(REQ-1, scope=class)
    """
3) Linking language items to a requirement (Python, C, C++, Rust)
For Python, @relation markers can be placed inside doc strings to link functions and classes.
class Foo:
    def bar(self):
        """
        This function implements ...

        @relation(REQ-1, scope=function)
        """
For the C and C++ languages, if a @relation marker is included in a function declaration prototype (which is the most common practice), StrictDoc also creates a link between the requirement and the corresponding C function definition.
/**
 * Some text.
 *
 * @relation(REQ-1, scope=function)
 */
void hello_world(void) {
    print("Hello, World\n");
}
For Rust, @relation marker can be placed inside doc comments to automatically infer the linked item. This works for almost all Rust language elements like modules, functions, traits, enums or structs.
/*!
 * This module does...
 * @relation(REQ-1)
 */

use std::fmt;

/**
 * With this enum, ...
 * @relation(REQ-2)
 */
pub enum Niceness {
    /// This variant means ...
    /// @relation(REQ-3)
    Nice,

    /// And this variant means ...
    /// @relation(REQ-4)
    Awesome,
}

/**
 * Implement Debug trait for Niceness.
 * @relation(REQ-5)
 */
impl fmt::Debug for Niceness {
    /// @relation(REQ-6)
    fn fmt(&self, f: &mut fmt::Formatter) -> fmt::Result {
        match *self {
            /// @relation(REQ-7)
            Niceness::Nice => {
                write!(f, ":-)")
            }
            /// @relation(REQ-8)
            Niceness::Awesome => {
                write!(f, ":-D")
            }
        }
    }
}
4) Linking a range to a requirement
def foo():
    # @relation(REQ-1, scope=range_start)
    print("Hello, World!")
    # @relation(REQ-1, scope=range_end)
5) Linking a single line to a requirement
def foo():
    # @relation(REQ-1, scope=line)
    print("Hello, World!")
Note
For Rust, line and range marker are supported in normal comments, but not doc comments.
11.3. Linking requirements to source code
The linking of requirements to source files is arranged with a special RELATION type File.
Note
Language-specific links are available for supported source file types. See 🔗 11.1. Language-aware parsing of source code.
1) Linking a requirement to a whole source file
[REQUIREMENT]
UID: REQ-001
RELATIONS:
- TYPE: File
  VALUE: file.py
TITLE: File reference
STATEMENT: This requirement references the file.
2) Linking a requirement to range in a source file
[REQUIREMENT]
UID: REQ-002
TITLE: Range file reference
STATEMENT: This requirement references the file.py file.
RELATIONS:
- TYPE: File
  VALUE: file.py
  LINE_RANGE: 2, 4
3) Linking a requirement to language items in a source file
[REQUIREMENT]
UID: REQ-002
TITLE: Function reference
STATEMENT: This requirement references a function in a file.
RELATIONS:
- TYPE: File
  VALUE: file.py
  FUNCTION: hello_world
- TYPE: File
  VALUE: file.c
  FUNCTION: Foo.hello_world_2
- TYPE: File
  VALUE: file.rs
  FUNCTION: <file::FooTuple as file::FooTrait>::bar
Note
Rules for building the full qualified path of an identifier depend on the language of the source file. For linking to Python functions in classes, a class name has to be added in a format: <class name>.<function name>. For linking to any Rust identifier, canonical paths for a single file are used.
4) Linking a requirement to a class in a source file (Python only)
[REQUIREMENT]
UID: REQ-002
TITLE: Class reference
STATEMENT: This requirement references a class in a file.
RELATIONS:
- TYPE: File
  VALUE: file.py
  CLASS: Foo
11.4. File relations roles
StrictDoc supports relation roles for both SDoc nodes with TYPE: File and the source file markers.
To establish a forward link with a role from an SDoc node to a source file:
[REQUIREMENT]
UID: REQ-002
TITLE: Foo
STATEMENT: Bar
RELATIONS:
- TYPE: File
  VALUE: file.py
  ROLE: Test
To establish a backward link from a source file to an SDoc node:
/**
 * Some text.
 *
 * @relation(REQ-1, scope=function, role=Implementation)
 */
void hello_world(void) {
    print("Hello, World\n");
}
Note
See 🔗 6.3.3.1. Relation roles for a general description of the SDoc relations.
11.5. Ignoring source code markers
Sometimes, it is necessary to ignore @relation(...) markers in a specific section of a file. This can be done using the special skip keyword, as shown below:
# @relation(skip, scope=range_start)
# @relation(REQ-001, scope=range_start)
...
# @relation(REQ-001, scope=range_end)
# @relation(skip, scope=range_end)
In this example, the skip-relation causes StrictDoc to ignore the REQ-001 requirement, so that it does not appear in the traceability information.
11.6. Parsing SDoc nodes from source code comments (experimental, for C/C++ and Rust only)
Note
Insight: It is often practical to avoid maintaining test specifications and similar documents separately from the source code, since the information is closely related anyway.
In addition to recognizing the @relation(...) markers described above, StrictDoc can also read SDoc node fields when they are defined in source code comments.
/**
 * Some text.
 *
 * @relation(REQ-1, scope=function)
 *
 * INTENTION: Intention...
 *
 * INPUT: This
 *        is
 *        a statement
 *        \n\n
 *        And this is the same statement's another paragraph.
 *
 * EXPECTED_RESULTS: This is a comment.
 */
void test_case_1(void) {
    print("hello world\n");
}
To enable SDoc node parsing, enable requirement-to-source traceability and register the corresponding source file in the strictdoc_config.py configuration as follows:
from strictdoc.core.project_config import ProjectConfig, SourceNodesEntry


def create_config() -> ProjectConfig:
    config = ProjectConfig(
        project_features=[
            "REQUIREMENT_TO_SOURCE_TRACEABILITY",
        ],
        # If custom include_source_paths are set, it must include the corresponding source file.
        include_source_paths=["tests/**"],
        source_nodes=[
            SourceNodesEntry(
                path="tests/",
                uid="TEST_DOC",
                node_type="TEST_SPEC"
            )
        ],
    )
    return config
With the above declaration, StrictDoc will locate the document with the specified UID and automatically populate it with parsed descriptions. This allows the user to start with a basic template of their choice, knowing that it will be filled with content extracted from the source files.
A document template example:
[DOCUMENT]
MID: c2d4542d5f1741c88dfcb4f68ad7dcbd
TITLE: Test specification
UID: TEST_DOC
12. ReqIF support
StrictDoc has an initial support of exporting to and importing from the ReqIF format.
Note
It is not possible to implement a single export/import procedure that works well for all ReqIF XML files produced by various requirements management tools. The export/import workflow is therefore tool-specific. See 🔗 12.4. ReqIF implementation details for more details.
Supported formats:
- StrictDoc's "native" export/import between SDoc and ReqIF
Planned formats:
- The format recommended by the ReqIF Implementation Guide that attempts to harmonize the developments of ReqIF by requirements management tools.
12.1. Import flow (ReqIF -> SDoc)
strictdoc convert input.reqif output.sdoc
The command does the following:
- The ReqIF is parsed from XML file to ReqIF in-memory model using the reqif library.
- The ReqIF in-memory model is converted to SDoc in-memory model. In this case, sdoc indicates that the native ReqIF-to-SDoc conversion procedure must be used.
- The SDoc in-memory model is written to an .sdoc file.
12.2. Export flow (SDoc -> ReqIF)
strictdoc export --formats=reqif-sdoc %S/input.sdoc
The command does the following:
- The SDoc file is parsed to an SDoc in-memory model.
- The SDoc in-memory model is converted to a ReqIF in-memory model using the native SDoc-to-ReqIF conversion procedure as indicated by the reqif-sdoc argument.
- The ReqIF in-memory model is unparsed a to ReqIF XML file using reqif library.
12.3. ReqIF options
The following options are available for ReqIF export/import commands.
--reqif-multiline-is-xhtml This option makes StrictDoc to export all multiline fields as XHTML attributes, not as STRING (the default behavior). This is useful for interfacing with tools, such as Polarion, which assume XHTML as the primary format for writing multiline text.
--reqif-import-markup={RST,HTML,Text} This option makes StrictDoc import ReqIF to SDoc documents, setting their MARKUP option to the markup value provided. The default value is RST which is the default markup of StrictDoc. When working with other ReqIF tools, very often this option can be set to HTML. It is likely that with this option, the previous option --reqif-multiline-is-xhtml should be enabled as well.
--reqif-enable-mid This option requires the machine identifiers option to be enabled (see 🔗 6.2.4.1. MID – Machine identifier) and allows all nodes machine identifiers (MID) exported as ReqIF IDENTIFIERs. This option can be useful when the MID/IDENTIFIER stability of document, section, and requirement nodes is critical when doing iterative export/import roundtrips.
All options can be also specified in a project's Python config file as follows:
from strictdoc.core.project_config import ProjectConfig


def create_config() -> ProjectConfig:
    config = ProjectConfig(
        reqif_multiline_is_xhtml=True,
        reqif_import_markup="HTML",
        reqif_enable_mid=True,
    )
    return config
12.4. ReqIF implementation details
The ReqIF is a standard which is maintained by Object Management Group (OMG). One important feature of the ReqIF standard is that it requires a fixed XML structure but still leaves certain details open to the implementation by the ReqIF and requirements management tools developers. Specifically, each tool may use it own field names and structure to represent requirements and sections/chapters.
In order to accommodate for the differences between ReqIF files produced by various tools, the ReqIF processing is split into two layers:
1) Parsing ReqIF from .reqif XML files into ReqIF in-memory tree of Python objects as well as unparsing the ReqIF in-memory tree back to ReqIF XML files is extracted to a separate library: strictdoc-project/reqif.
2) Converting between in-memory trees of SDoc and ReqIF. This layer is part of StrictDoc.
For further overview of the ReqIF format and the reqif library's implementation details, refer to strictdoc-project/reqif's documentation.
13. Excel support
StrictDoc provides a support for Excel XLS/XLSX on input and Excel XLSX on output.
On input, the headers of sheet1 are used to put together a custom grammar and the requirements are imported one row per requirement. A best effort is made by the importer to recognize names of headers and map these to strictdoc requirement fields.
Note
A roundtrip "SDoc -> Excel -> SDoc" is not yet supported.
13.1. Import flow (Excel XLS/XLSX -> SDoc)
strictdoc convert input.xls output.sdoc --input-format=excel
The command does the following:
- The Excel file is parsed to SDoc in-memory model using the xlrd library for XLS or the openpyxl library for XLSX files.
- The SDoc in-memory model is written to an .sdoc file.
13.2. Export flow (SDoc -> Excel XLSX)
strictdoc export --formats=excel --output-dir=Output input.sdoc
The command does the following:
- The SDoc file is parsed to an SDoc in-memory model.
- The SDoc in-memory model is converted to an Excel XLSX file using the XlsWriter library.
For exporting only selected fields:
strictdoc export --formats=excel --fields=UID,STATUS --output-dir=Output input.sdoc
For exporting a folder with multiple SDoc files, specify a path to a folder or . for a current directory:
strictdoc export --formats=excel .
If the output-dir option is not provided, the output/ folder is the default value.
14. Project statistics screen
The project statistics screen displays useful information about a documentation project as well as some requirements-based statistics.
To activate the project statistics screen, add/edit the strictdoc_config.py config file in the root of your repository with documentation content.
from strictdoc.core.project_config import ProjectConfig


def create_config() -> ProjectConfig:
    config = ProjectConfig(
        project_title="My project",
        project_features=[
            "PROJECT_STATISTICS_SCREEN"
        ],
    )
    return config
This feature is not enabled by default because it has not undergone sufficient testing by users. The particular aspect requiring extensive testing is related to StrictDoc's interaction with Git to retrieve git commit information. There remain certain unexamined edge cases and portability concerns, e.g., testing on Windows, testing projects that have no Git version control, calling StrictDoc outside of a project's root folder.
14.1. User-provided custom statistics generator (experimental)
StrictDoc allows users to write their own custom statistics generators.
To connect a custom generator, add it to the strictdoc_config.py configuration file as follows:
from strictdoc.core.project_config import ProjectConfig


def create_config() -> ProjectConfig:
    config = ProjectConfig(
        project_title="StrictDoc Documentation",
        statistics_generator="custom_statistics.CustomStatisticsGenerator",
    )
    return config
The path specified by the config variable must be a valid path to a Python file, and the last component must reference an existing statistics generator class. StrictDoc automatically adds the document input path to its Python search paths, so the specified path must be discoverable relative to the location where the SDoc documents are read.
A statistics generator is a class that iterates over the traceability index, collects and calculates relevant statistics about the traceability graph, and stores the results as a list of Metric and MetricSection objects.
Note
StrictDoc’s built-in statistics generator is a good example of how to implement a custom one. See SDocStatisticsGenerator.
15. Mermaid diagramming and charting tool
The Mermaid tool allows to create diagrams inside of StrictDoc/RST markup as follows:
[TEXT]
STATEMENT: >>>
.. raw:: html

    <pre class="mermaid">
    graph TD
    A[Enter Chart Definition] --> B(Preview)
    B --> C{decide}
    C --> D[Keep]
    C --> E[Edit Definition]
    E --> B
    D --> F[Save Image and Code]
    F --> B
    </pre>
<<<
Example:
graph TD
A[Enter Chart Definition] --> B(Preview)
B --> C{decide}
C --> D[Keep]
C --> E[Edit Definition]
E --> B
D --> F[Save Image and Code]
F --> B
Mermaid is enabled by default. No configuration is required to use Mermaid diagrams.
16. PlantUML diagramming tool
PlantUML diagrams can be created inside of StrictDoc/RST markup as follows:
[TEXT]
STATEMENT: >>>
.. raw:: html

    <pre class="plantuml">
    @startuml
    Alice -> Bob: Hello
    @enduml
    </pre>
<<<
Example:
@startuml
Alice -> Bob: Hello
@enduml
Markdown documents can use a fenced code block tagged plantuml instead:
```plantuml
@startuml
Alice -> Bob: Hello
@enduml
```
Like Mermaid, PlantUML diagrams are rendered entirely in the browser using a vendored copy of the PlantUML engine: diagram source never leaves the machine viewing the document. PlantUML is enabled by default. No configuration is required to use PlantUML diagrams.
17. Configuration
Warning
StrictDoc is migrating from TOML to Python for its configuration files, see the migration note: 🔗 26.3. Migrating StrictDoc Configuration: Python Replaces TOML (2025 Q4).
Once the new Python configuration syntax has been sufficiently tested, using TOML will trigger deprecation warnings. The removal of TOML support is expected to take place in 2026-Q1.
17.1. Project-level configuration
StrictDoc supports reading configuration from a Python config file. The file must be called strictdoc_config.py and shall be stored in the same folder which is provided as a path to the SDoc documents.
For example, strictdoc export . will make StrictDoc recognize the config file, if it is stored under the current directory.
17.1.1. Project title
This option specifies a project title.
from strictdoc.core.project_config import ProjectConfig


def create_config() -> ProjectConfig:
    config = ProjectConfig(
        project_title="StrictDoc Documentation",
    )
    return config
17.1.2. Path to assets
By default, StrictDoc copies its CSS/JS and other asset files to a folder _static in the HTML output directory.
Sometimes, it is desirable to change the folder name. For example, the GitHub Pages static website engine expects the assets to be found in the assets folder.
The html_assets_strictdoc_dir allows changing the assets folder name:
from strictdoc.core.project_config import ProjectConfig


def create_config() -> ProjectConfig:
    config = ProjectConfig(
        dir_for_sdoc_assets="assets",
    )
    return config
17.1.3. Path to cache dir
StrictDoc uses caching when reading and writing artifacts. By default, all cache files are stored in the output/_cache directory. If a custom output directory is specified, the cache will be placed in the _cache subdirectory within that output directory.
It is possible to override the default cache location using the cache_dir option in the configuration file. For example, setting it to ./output/build will store cache files there.
from strictdoc.core.project_config import ProjectConfig


def create_config() -> ProjectConfig:
    config = ProjectConfig(
        dir_for_sdoc_cache="./strictdoc_cache",
    )
    return config
One reserved value for this parameter is $TMPDIR which makes StrictDoc generate temporary files in the OS temporary directory under strictdoc_cache folder.
See 🔗 8. Caching artifacts for an overview of how caching works.
17.1.4. Path to source root
When the REQUIREMENT_TO_SOURCE_TRACEABILITY feature is activated, StrictDoc looks for source files in the directory from which the strictdoc program is run. This can be changed with the source_root_path option.
from strictdoc.core.project_config import ProjectConfig


def create_config() -> ProjectConfig:
    config = ProjectConfig(
        project_features=[
            "REQUIREMENT_TO_SOURCE_TRACEABILITY",
        ],
        source_root_path="source_root/",
    )
    return config
The source_root_path option supports relative paths, e.g. ../source_root/.
17.1.5. Document line width
The document_line_width option sets the maximum line width for document content. When set, the SDoc and Markdown writers automatically wrap long text paragraphs to the configured number of columns whenever a document is saved.
This affects both the strictdoc format command and the web server's save operations. The minimum accepted value is 80.
from strictdoc.core.project_config import ProjectConfig


def create_config() -> ProjectConfig:
    config = ProjectConfig(
        document_line_width=80,
    )
    return config
Structured content is never wrapped: bullet lists, numbered lists, indented blocks (code), RST directives (.. code::, etc.), and Markdown fenced code blocks are preserved as-is.
17.1.6. Path to custom HTML2PDF template
StrictDoc uses an internal default template when exporting documents in PDF format.
If the front page, header, or footer needs to be customised, it is possible to provide a custom template with the html2pdf_template option.
from strictdoc.core.project_config import ProjectConfig


def create_config() -> ProjectConfig:
    config = ProjectConfig(
        html2pdf_template="assets/template/index.jinja",
        project_features=[
            "HTML2PDF",
        ],
    )
    return config
When specified, the provided template will override the internal default template. The path can be absolute or relative to the project root.
Note
An example template can be found here
17.1.7. Path to custom favicon
By default, StrictDoc uses its own favicon for the HTML export and the server.
A project can supply its own favicon file with the favicon_path option.
from strictdoc.core.project_config import ProjectConfig


def create_config() -> ProjectConfig:
    config = ProjectConfig(
        favicon_path="your_folder/favicon.svg",
    )
    return config
The path must be relative to the project root and point to an existing file. Any common favicon format is supported (.svg, .ico, .png, etc.). favicon_path applies in every mode, including StrictDoc's own development and test server, overriding the built-in favicon there too.
17.1.8. Path to custom CSS
A project can supply its own stylesheet with the custom_css_path option, to extend or override StrictDoc's default styles in the HTML export and on the server.
from strictdoc.core.project_config import ProjectConfig


def create_config() -> ProjectConfig:
    config = ProjectConfig(
        custom_css_path="your_folder/custom.css",
    )
    return config
The path must be relative to the project root and point to an existing file. The referenced CSS file is applied on top of StrictDoc's own stylesheets, so only the rules that need to be changed have to be specified.
17.1.9. Include/exclude document paths
Use include_doc_paths and exclude_doc_paths paths to whitelist/blacklist paths to SDoc documents.
In the following example, StrictDoc will look for all files in the input project directory, except all documents in the tests/ folder.
from strictdoc.core.project_config import ProjectConfig


def create_config() -> ProjectConfig:
    config = ProjectConfig(
        include_doc_paths=[
            "/docs/*.sdoc"
        ],
        exclude_doc_paths=[
            "/tests/**"
        ],
    )
    return config
The behavior of wildcard symbols * and ** is as follows:
- The * expands to any combination of symbols that represent a valid file name, excluding the forward and backward slashes, which limits this wildcard to only match a single directory.
- The ** expands to any combination of valid file name symbols, possibly separated by any number of slashes.
| Example | Description |
|---|---|
| /docs/* or /docs/*.sdoc | Match all documents found in the root docs/ folder but not in its subdirectories. |
| /docs/** | Match all documents found in the root docs/ folder and all its subdirectories. |
| **docs/** | Match all documents found in paths that contain the docs/ path component. |
Note
See 🔗 20.1. Finding document and source files for a description of performance considerations related to file discovery.
17.1.10. Include/exclude source files paths
Use include_source_paths and exclude_source_paths to whitelist/blacklist paths to source files when the traceability between requirements and source files feature is enabled.
from strictdoc.core.project_config import ProjectConfig


def create_config() -> ProjectConfig:
    config = ProjectConfig(
        project_features=[
            "REQUIREMENT_TO_SOURCE_TRACEABILITY"
        ],
        include_source_paths=[
            "/src/**"
        ],
        exclude_source_paths=[
            "/src/tests/**"
        ],
    )
    return config
The behavior of the wildcards is the same as for the include_doc_paths/exclude_doc_paths options.
Note
See 🔗 20.1. Finding document and source files for a description of performance considerations related to file discovery.
17.1.11. Selecting features
StrictDoc has optional features and features that are developed with a lower priority.
The feature of exporting the SDoc documents to HTML document view is a core feature and is always enabled. The option features allows selecting which additional features should be activated or not.
The following is an example of the default configuration. The same features are active/inactive when the option features is not specified.
from strictdoc.core.project_config import ProjectConfig


def create_config() -> ProjectConfig:
    config = ProjectConfig(
        project_title="StrictDoc Documentation",
        project_features=[
            # Stable features that are enabled by default.
            "TABLE_SCREEN",
            "TRACEABILITY_SCREEN",
            "DEEP_TRACEABILITY_SCREEN",

            # These features are disabled by default.
            # "REQIF",
            # "HTML2PDF",
            # "PROJECT_STATISTICS_SCREEN",
            # "TRACEABILITY_MATRIX_SCREEN",
            # "REQUIREMENT_TO_SOURCE_TRACEABILITY"
        ],
    )
    return config
See 🔗 23. Experimental features where the experimental features are outlined.
17.1.11.1. Enable all features
To select all available features, stable and experimental, specify ALL_FEATURES.
from strictdoc.core.project_config import ProjectConfig


def create_config() -> ProjectConfig:
    config = ProjectConfig(
        project_features=[
            "ALL_FEATURES"
        ],
    )
    return config
The advantage of this option is that all feature toggles become activated, and all extra screens and buttons are generated and visible.
The disadvantage is that StrictDoc spends more time rendering extra screens that might not be needed by a particular user.
If ALL_FEATURES is present, all features are activated, regardless of any other features that are also specified or not.
17.1.11.2. Disable all features
To disable all features, specify the features option but leave it empty:
from strictdoc.core.project_config import ProjectConfig


def create_config() -> ProjectConfig:
    config = ProjectConfig(
        project_features=[
            # Nothing specified.
        ],
    )
    return config
17.1.12. Server configuration
17.1.12.1. Host and port
By default, StrictDoc runs the server on 127.0.0.1:5111.
Use the [server] section to configure the host and port as follows.
from strictdoc.core.project_config import ProjectConfig


def create_config() -> ProjectConfig:
    config = ProjectConfig(
        project_title='Test project with a host "localhost" and a port 5000',
        server_host="localhost",
        server_port=5000,
    )
    return config
17.1.12.2. Chunked documents threshold
When a document contains many nodes, the StrictDoc server can render the document in lazily loaded chunks to speed up the initial page load. The lazy_document_loading_threshold option controls the threshold number of nodes: the chunked rendering is activated for documents that contain more than this number of nodes. The default value is 200. Setting the option to 0 disables the chunked rendering completely. Threshold values below 100 also become the chunk size: the documents are loaded in chunks of min(threshold, 100) nodes.
Set the lazy_document_loading_threshold option in strictdoc_config.py to configure this option.
from strictdoc.core.project_config import ProjectConfig


def create_config() -> ProjectConfig:
    config = ProjectConfig(
        project_title="Test project",
        lazy_document_loading_threshold=100,
    )
    return config
17.1.13. Custom node prefix
By default, a node's UID prefix is derived from the document grammar: either the element's PREFIX property, or the document/section prefix a node is nested under. A user can override this behavior for the whole project by registering a custom Python function via ProjectConfig's custom_node_prefix_function argument.
The function is called whenever a new node's prefix needs to be determined: by strictdoc manage new, by strictdoc manage auto-uid, and by the web interface's "Add node" actions. It receives the node that a new sibling/child is being created under (or, for manage auto-uid, the existing node that is missing a UID), the node's grammar element, the containing document, the traceability index, and the project config. The function must return either a prefix string, or None to fall back to the default StrictDoc behavior described above.
The function must be registered in the StrictDoc Python config file:
from typing import Optional, Union

from strictdoc.api import (
    GrammarElement,
    ProjectConfig,
    SDocDocument,
    SDocNode,
    TraceabilityIndex,
)


def custom_node_prefix(
    node: Union[SDocNode, SDocDocument],
    grammar_element: GrammarElement,
    document: SDocDocument,
    traceability_index: TraceabilityIndex,
    project_config: ProjectConfig,
) -> Optional[str]:
    if document.reserved_uid == "MY_UID":
        return "MY_UID_PREFIX-"
    # Revert to the default behavior.
    return None


def create_config() -> ProjectConfig:
    return ProjectConfig(
        project_title="My Project",
        custom_node_prefix_function=custom_node_prefix,
    )
17.1.14. Custom node UID
By default, a new node's full UID is the concatenation of its resolved prefix (see "Custom node prefix" above) and the next available number: f"{prefix}{next_number}". A user can override this composition step for the whole project by registering a custom Python function via ProjectConfig's custom_node_uid_function argument, for example to zero-pad the number or use a different separator.
The function is called at the same points as custom_node_prefix_function: by strictdoc manage new, by strictdoc manage auto-uid, and by the web interface's "Add node" actions. It receives the already-resolved prefix and next available number, together with the same node/grammar element/document/ traceability index/project config context. The function must return either a UID string, or None to fall back to the default f"{prefix}{next_number}" composition.
The function must be registered in the StrictDoc Python config file:
from typing import Optional, Union

from strictdoc.api import (
    GrammarElement,
    ProjectConfig,
    SDocDocument,
    SDocNode,
    TraceabilityIndex,
)


def custom_node_uid(
    prefix: str,
    next_number: int,
    node: Union[SDocNode, SDocDocument],
    grammar_element: GrammarElement,
    document: SDocDocument,
    traceability_index: TraceabilityIndex,
    project_config: ProjectConfig,
) -> Optional[str]:
    if document.reserved_uid == "MY_UID":
        return f"{prefix}{next_number:04d}"
    # Revert to the default behavior.
    return None


def create_config() -> ProjectConfig:
    return ProjectConfig(
        project_title="My Project",
        custom_node_uid_function=custom_node_uid,
    )
17.2. Command-line interface options
17.2.1. Project title
By default, StrictDoc generates a project tree with a project title "Untitled Project". To specify the project title use the option --project-title.
strictdoc export --project-title "My Project" .
17.2.2. Parallelization
To improve performance for the large document trees (1000+ requirements), StrictDoc parallelizes reading and generation of the documents using process-based parallelization: multiprocessing.Pool and multiprocessing.Queue.
Parallelization improves performance but can also complicate understanding behavior of the code if something goes wrong.
To disable parallelization use the --no-parallelization option:
strictdoc export --no-parallelization docs/
Note
Currently, only the generation of HTML documents is parallelized, so this option will only have effect on the HTML export. All other export options are run from the main thread. Reading of the SDoc documents is parallelized for all export options and is disabled with this option as well.
18. Python API
At present, StrictDoc lacks a documented public Python API. Nevertheless, users can leverage StrictDoc's internal API to enhance existing functions or create custom import, export, and analysis tools. The architecture of StrictDoc is highly modular, so for each functional block there shall always be a dedicated Python class with a public interface, see 🔗 3. High-level architecture.
One good example is the SDWriter class, which exercises the complete export of the Python data objects to the SDoc format. Since, the SDoc format is the primary data format of StrictDoc, the SDWriter is quite feature-rich in what it does and covers. The RSTWriter is less powerful because it does not reflect the full data model, but is probably worth a look as well.
The strictdoc/backend/reqif folder contains exporter/importer routines for the ReqIF format. There, the core classes from the Python data model, e.g. SDocNode, Section, Document, Grammar, etc. are created or read from and to the ReqIF format.
The ManageAutoUIDCommand class features a good use of all APIs that one may need to read/update/write back a SDoc document tree:
- The TraceabilityIndex is created from a project config. The traceability index is the main class for storing the whole traceability graph in Python objects. It has plenty of methods for reading and writing things from the graph.
- The DocumentUIDAnalyzer is an example of how the objects are manipulated in memory.
- And finally the final sequence writes the mutated traceability graph back to files using SDWriter.
The tests/integration/examples/python_api folder contains user-requested or community-contributed examples of scripts that use the Python API.
For any custom Python API request, for example, a need to do a more advanced data analysis on SDoc data, open a GitHub issue and your specific issue will be handled.
19. User plugins
StrictDoc allows a user to register a Python plugin class which will have its methods/hooks called while StrictDoc runs a given command.
The only hook supported at the moment is traceability_index_build_finished, which is called right after StrictDoc has finished reading all input documents and source files, and after it has finished calculating the entire traceability index.
The plugin must be registered in the StrictDoc Python config file:
import os
import sys

from strictdoc.api import ProjectConfig

sys.path.append(os.path.dirname(__file__))

from user_plugin import UserPlugin


def create_config() -> ProjectConfig:
    config = ProjectConfig(
        project_title="StrictDoc Documentation",
        user_plugin=UserPlugin()
    )
    return config
The plugin class can be implemented as follows:
from strictdoc.api import StrictDocPlugin, TraceabilityIndex


class UserPlugin(StrictDocPlugin):
    def traceability_index_build_finished(
        self, traceability: TraceabilityIndex
    ):
        pass
19.1. Custom validations
The StrictDoc plugin feature can be used to implement custom validations specific to a user project.
Example:
from strictdoc.api import (
    SDocDocumentIterator,
    SDocNode,
    StrictDocPlugin,
    TraceabilityIndex,
)


class UserPlugin(StrictDocPlugin):
    def traceability_index_build_finished(
        self,
        traceability: TraceabilityIndex
    ):
        for document in traceability.document_tree.document_list:
            assert document.meta is not None

            document_iterator = SDocDocumentIterator(document)

            for node, _ in document_iterator.all_content(
                print_fragments=False,
            ):
                # Attach a validation issue to the entire node.
                traceability.validation_index.add_issue(
                    node,
                    issue="The whole node is really bad.",
                    field=None,
                    subject=f"Node: {node.reserved_title}",
                )
                # Attach a validation issue to a specific field of the node.
                traceability.validation_index.add_issue(
                    node,
                    issue="UID field is really bad.",
                    field="UID",
                    subject=f"Node: {node.reserved_title}",
                )
The nodes with validation issues attached will be displayed as follows:
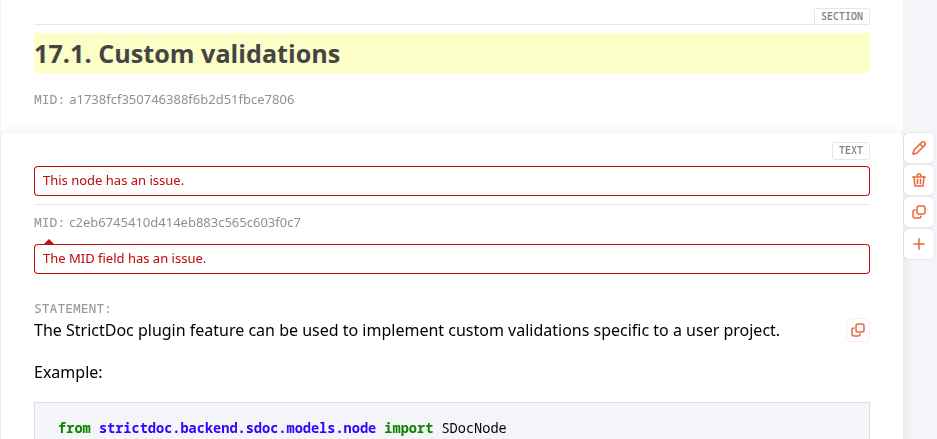
Warning
This custom validations feature is not yet fully supported in the editable web interface. If a user modifies a given node, its validations may not be updated or re-evaluated correctly. See https://github.com/strictdoc-project/strictdoc/issues/1229 for more details.
20. Performance considerations
20.1. Finding document and source files
When the number of document and source files grows, StrictDoc has to iterate over the contents of the disk using the filters specified in the configuration file.
When searching for information, StrictDoc considers filters such as include/exclude_doc_paths and include/exclude_source_paths, as well as the .gitignore file found in the root project folder.
When the number of folders to search and the number of source files grows to thousands or more, StrictDoc has to perform many regular expression matches. This can slow down the documentation generation process if the filters are not optimized well enough.
Every rule specified in the search filters in the configuration file or in .gitignore becomes a regular expression that StrictDoc has to evaluate for every folder and file being iterated over. The following guidelines are therefore relevant:
- The search filters used should be as precise as possible to help StrictDoc decide as quickly as possible whether it should whitelist or blacklist a given path.
- The search is performed using Python's os.walk(<project root>, topdown=True). The search is therefore top-down, which allows exclude filters to be applied at the first point of contact with undesired folders. If an undesired folder is detected, the search does not descend into that folder and entirely skips its contents.
- If a folder to be included or excluded is a root-level folder, the search string should start with / to indicate that StrictDoc should apply this rule only to root-level folders, ignoring all other paths as it descends into subdirectories. Example: /strictdoc/foo/ instead of foo.
- Similarly, if a folder to be excluded is not at the root level but is known to be a subdirectory of a specific root-level directory, it is better to specify the full path. For example, instead of **/Output/, it is better to specify /tests/integration/**/Output/ to ensure that StrictDoc does not consider directories outside tests/integration.
- If a user project produces many cache artifacts using multiple tools, it is recommended to store them all in a single cache folder, for example build/tool1_cache, build/tool2_cache, etc., and configure StrictDoc to ignore only the /build/ folder instead of several separate ones. This reduces the number of lookups StrictDoc has to perform during the search.
- When whitelisting paths, it is better to specify paths that are known to contain wildcards in specific locations. For example, use src/**.py and tests/**.py instead of *.py.
21. Portability considerations
Note
TL;DR: The following topic of portability becomes relevant if documentation created with StrictDoc has to be exported to another tool and especially if the other tool has to export the content back to StrictDoc. Writing custom export/import generators may be needed to enable a full interoperability when the less portable features are used.
The portability of documentation, particularly when it involves requirements, shares similarities to the portability of programming languages. StrictDoc has several features that are useful but they can also limit the interoperability of the documentation/requirements when the content is exchanged with other tools.
The following is a list of features that are considered less portable when it comes to interfacing with other tools through the existing export/import interfaces:
- 🔗 6.2.6. DOCUMENT_FROM_FILE – Composing documents from other documents. Composing documents from other documents is a useful feature but it may not be directly supported by other tools. When exporting to JSON or ReqIF, StrictDoc by default does not export included documents but only the including documents.
- 🔗 6.2.3. Composite nodes. A Composite Requirement is a useful concept which is natively supported by StrictDoc but it may be supported less by other tools.
- 🔗 6.2.4.3. LEVEL. Table of contents hierarchy where some nodes do not have TOC levels (or have custom TOC levels) can cause problems when exporting/importing documentation content if an interfacing tool does not support custom TOC nodes.
Note
It is easier to extend StrictDoc to produce a format supported by a given tool than it is to make the other tool export a 100%-identical content back to StrictDoc. If there is a need to interface with a tool X and something is missing in StrictDoc, please reach out to the developers (see 🔗 1.1. Contact the developers).
22. Interoperability with other tools
22.1. Doxygen
HTML documentation generated by StrictDoc can be integrated with Doxygen documentation.
Doxygen includes a TAGFILE feature that allows linking to external documentation. This tagfile is in XML format and looks like this:
<?xml version='1.0' encoding='UTF-8' standalone='yes' ?>
<tagfile doxygen_version="1.9.8">
  <compound kind="file">
    <name>REQ-1</name>
    <filename>strictdocfolder/mystrictdocreq.html#REQ-1</filename>
  </compound>
</tagfile>
StrictDoc automatically generates a Doxygen tagfile containing the requirements using the export command:
strictdoc export . --formats=html,doxygen
When a requirement is referenced in a source code comment block with the command \ref REQ-1, Doxygen includes a link to the corresponding <filename/> in the output.
The location of the StrictDoc export can be specified in the TAGFILE field, either as a relative path, e.g., TAGFILES = strictdoc.tag=../../strictdoc, or as an absolute URL, e.g., TAGFILES = strictdoc.tag=http://example.com/strictdoc.
To make the StrictDoc @relation keyword work with Doxygen, an alias has to be created:
ALIASES += relation{2}="\ref \1"
resulting in the following syntax to be recognized by Doxygen: @relation{REQ-1, scope=function}.
Relevant Doxygen documentation:
22.2. Valispace
Valispace provides a Python API, including an example script for exporting all project requirements in JSON format. See Examples: Get a complete project requirements tree.
The GetAllProjectRequirementsTree.py script can be used to create a converter that generates SDoc text files customized to the specifics of the project.
23. Experimental features
At any point in time, StrictDoc supports features that are still experimental. These features are either not fully developed or their testing has not been completed yet.
A feature is considered stable when all its known edge cases have been covered and enough users report that they have used and tested this feature.
See also 🔗 17.1.11. Selecting features for general instructions.
23.1. Markdown support (experimental)
StrictDoc supports Markdown as an input and output format for traceable documents. Markdown documents can contain sections, requirements, custom node types, metadata, and traceability relations.
This section provides a short introduction. For custom node types, fields, grammars, and relations, see 🔗 Markdown Specification.
1. Minimal example:
# Document example

## Section example

### Requirement example

**UID**: REQ-1

System A shall do B.
In the example above, the line System A shall do B. is implicitly converted to a requirement statement.
2. Example with relations and all explicit content fields:
# Requirements specification

## Section A

This is a section with two requirements.

### Requirement

**UID**: REQ-1 \
**Status**: Active

**Statement**: The system shall show a message.

**Rationale**: Users need feedback.

### Requirement

**UID**: REQ-2 \
**Status**: Active \
**Relations**:
- **Type**: Parent \
  **ID**: REQ-1

**Statement**: The system shall show "Hello".

**Rationale**: This is a simple example.
Note
The backward slashes are needed to ensure that, when browsing in non-StrictDoc Markdown browsers, the meta fields are rendered close to each other, forming a meta information block.
23.1.1. PREFIX
The PREFIX meta field controls the prefix used when auto-generating UIDs. It can be set at the document level or at the section level. See 🔗 9.1. Automatic assignment of requirements UID.
1. Document-level PREFIX:
The PREFIX field is placed in the H1 meta block, immediately after the document title.
# Requirements specification

**PREFIX**: MYDOC-

## Section

### Requirement

**UID**: MYDOC-001

System A shall do B.
2. Section-level PREFIX:
A section can declare its own prefix by using the **TYPE**: SECTION meta field together with **PREFIX**. The section-level prefix overrides the document-level prefix for all requirements within that section.
# Requirements specification

## Chapter 2

**TYPE**: SECTION \
**PREFIX**: LEVEL2-REQ-

### Requirement

**UID**: LEVEL2-REQ-001

System A shall do B.
23.1.2. Deep headings (more than six levels)
CommonMark recognizes headings with at most six # characters, so a Markdown document can normally nest sections only five levels below the document title. SDoc documents, however, support arbitrary nesting depth.
To allow deeply nested documents to round-trip through the Markdown format, StrictDoc deviates from CommonMark on this point: the Markdown reader accepts headings with seven or more # characters, following the precedent of Pandoc's Markdown reader, and the Markdown writer emits such headings for nodes nested deeper than six levels.
Example of a requirement nested seven levels below the document title:
# Deep headings example

## Level 1

### Level 2

#### Level 3

##### Level 4

###### Level 5

####### Level 6

######## Deep requirement

**UID**: REQ-DEEP-1

**Statement**: Statement nested seven levels below the document.
Note
Headings deeper than six levels are a non-CommonMark extension: other Markdown tools, such as GitHub or VS Code, render seven or more # characters as plain paragraph text. Documents that must remain fully portable to such tools should not nest sections deeper than six levels.
23.2. Search and filtering
StrictDoc supports search and filtering of document content. However, this feature has not been extensively tested and is hidden behind a feature flag. To activate it, enable the corresponding setting in the strictdoc_config.py configuration file:
from strictdoc.core.project_config import ProjectConfig


def create_config() -> ProjectConfig:
    config = ProjectConfig(
        project_features=[
            "SEARCH"
        ],
    )
    return config
The web interface includes the Search screen, designed for conducting queries against a document tree. The command-line interface supports filtering of requirements and sections through the export commands.
23.2.1. Query engine
The syntax of the search query is inspired by Python, utilizing a fixed grammar that converts search queries into corresponding Python expressions.
Important rules:
- Node properties and functions are accessed through node. or node["FIELD"] expressions.
- and and or expressions must be grouped using round brackets.
- Only double quotes are accepted for strings.
- For text fields, "text" in node["FIELD"] checks substring membership. The quantified forms any([...]) in node["FIELD"], all([...]) in node["FIELD"], and none([...]) in node["FIELD"] apply the same substring check to each listed string.
- For node["TAGS"], quantified list membership checks exact comma-space-separated tag values.
| Query | Description |
|---|---|
| node.is_requirement | Find all requirements. |
| node.is_section | Find all sections. |
| node.is_root | Find all requirements or sections from documents with ROOT: True. See 🔗 6.2.1. DOCUMENT for the description of the ROOT option. |
| (node.is_requirement and "System" in node["TITLE"]) | Find all requirements with a TITLE that contains "System". |
| (node.is_requirement and node.has_parent_requirements) | Find all requirements which have parent requirements. |
| (node.is_requirement and node.has_child_requirements) | Find all requirements which have child requirements. |
| any(["tag_a", "tag_b"]) in node["TAGS"] | Find all nodes that have at least one of the listed tags. |
| all(["tag_a", "tag_b"]) in node["TAGS"] | Find all nodes that have every listed tag. |
| none(["excluded_a", "excluded_b"]) in node["TAGS"] | Find all nodes that have none of the listed tags. |
23.2.2. Filtering content
The export command-line interface command supports filtering documentation content with the --filter-nodes option.
The option is based on the Query Engine, so the same rules that are valid for Search also apply for filtering. When a filter is applied, only the whitelisted nodes will be exported.
Example:
strictdoc export . --filter-nodes '"System" in node["TITLE"]'
strictdoc export . --filter-nodes 'any(["tag_a", "tag_b"]) in node["TAGS"]'
23.3. Document tree map screen
The Document Tree Map screen, or simply Tree Map, provides an interactive visualization of the document tree and of requirements coverage by source files and tests.
The screen renders three maps: the complete document tree, requirements coverage by source files, and requirements coverage by tests. A node's area represents its weight, and its color represents the coverage value for the selected map. Hold Shift over a node to see its title, MID, and UID.
The feature can be activated as follows:
from strictdoc.core.project_config import ProjectConfig


def create_config() -> ProjectConfig:
    config = ProjectConfig(
        project_title="My project",
        project_features=[
            "TREE_MAP_SCREEN"
        ],
    )
    return config
The feature has experimental status because it has only been tested against StrictDoc's own documentation. Several questions still remain to be answered:
- How to allow users to customize this screen with their own additional visualizations.
- How to allow users to customize rules for color-coding the document nodes.
- How should the traceability mechanics work when there are multiple levels of requirements and a given requirement can reference either source files or child requirements.
23.4. Diff/changelog screen
The "Git Diff/Changelog" experimental feature in StrictDoc allows users to track changes between different versions of requirement documents. This feature provides a visual diff by highlighting what content has been added, removed, or modified within the SDoc files, using a style similar to Git diffs. It helps in maintaining version history, ensuring that changes are traceable, and supports auditing by showing how requirements evolve over time.
To activate the Diff/Changelog screen, add/edit the strictdoc_config.py config file in the root of your repository with documentation content.
from strictdoc.core.project_config import ProjectConfig


def create_config() -> ProjectConfig:
    config = ProjectConfig(
        project_title="My project",
        project_features=[
            "DIFF"
        ],
    )
    return config
With the feature enabled, the editable web server interface displays the corresponding Diff/Changelog screen, where users can select Git revisions to compare for change tracking.
To use the feature with a command-line interface:
strictdoc export . --generate-diff-git="HEAD^..HEAD"
Robust MID-based change tracking
For optimal results when using the Diff/Changelog feature in a StrictDoc-based project, it is strongly recommended to enable Machine Identifiers (MIDs) for all project artifacts, such as TEXT, REQUIREMENT, and others. Without MIDs, StrictDoc relies on change tracking based on node UIDs, which is less reliable due to at least the following two issues:
- The need to maintain UIDs for sections and text nodes, not only for requirements.
- Possible changes to node UIDs. If a node UID changes, for example due to a change in project conventions, StrictDoc cannot reliably determine whether the node has been modified or relocated in later versions of the documentation tree.
For more details, see 🔗 6.2.4.1. MID – Machine identifier.
23.5. HTML2PDF document generator
StrictDoc offers an experimental feature for converting HTML documents into PDF files. This feature aims to deliver a good PDF printing experience without the necessity of installing more sophisticated printing systems like LaTeX.
There are three methods of PDF printing available:
- Through the command-line interface with the strictdoc export --formats=html2pdf ... command.
- Within the web interface by clicking the 'Export to PDF' button.
- Also in the web interface, by navigating to a 'PDF' view of a document and using the browser's built-in Print function.
The first two methods require the Chrome browser and chromedriver to be installed on the user's computer. StrictDoc downloads chromedriver on demand by default, or uses a pre installed executable if strictdoc export --chromedriver=/path/to/chromedriver or the equivalent strictdoc_config.py option is given.
By default, StrictDoc attempts to detect an existing Chrome/Chromium installation. If Chrome is installed in a non-standard location, its binary can be specified explicitly with strictdoc export --chrome-binary=/path/to/chrome or the equivalent strictdoc_config.py option.
When printing from the command line (the first method), you can use the --generate-bundle-document option to have StrictDoc generate a single PDF document that bundles together all individual PDFs. The bundle document gets the document version/date information from Git by default which can be controlled in the strictdoc_config.py config (the default values are shown):
bundle_document_version = "@GIT_VERSION (Git branch: @GIT_BRANCH)"
bundle_document_date = "@GIT_COMMIT_DATETIME"
To disable bundle document version/date automatic generation, set bundle_document_version/bundle_document_date to empty strings or use any custom values.
The third method, the PDF screen, presents a version of the document that is optimized for browser printing. This approach allows for the creation of neatly formatted PDF documents or directly printed documents. Although this method is compatible with any browser, Chrome is recommended for the best printing results. Unlike Firefox and Safari, Chrome maintains the document's internal hyperlinks in the printed PDF.
To activate the HTML2PDF screen in the web interface, add/edit the strictdoc_config.py config file in the root of your repository with documentation content.
from strictdoc.core.project_config import ProjectConfig


def create_config() -> ProjectConfig:
    config = ProjectConfig(
        project_title="My project",
        project_features=[
            "HTML2PDF"
        ],
    )
    return config
This feature is not enabled by default because the implementation has not been completed yet. The underlying JavaScript library is being improved with respect to how the SDoc HTML content is split between pages, in particular the splitting of HTML <table> tags is being worked out.
23.5.1. Forcing a page break for each node
The html2pdf_forced_page_break_nodes allows specifying which nodes should always start on a new page when printed to PDF using the HTML2PDF feature. It is especially useful for documents that contain very large, descriptive requirement nodes with a lot of text. In such cases, starting each node on a new page helps avoid having the beginning of a node lost in the middle of a page.
Example of strictdoc_config.py:
from strictdoc.core.project_config import ProjectConfig


def create_config() -> ProjectConfig:
    config = ProjectConfig(
        project_features=[
            "HTML2PDF",
        ],
        html2pdf_forced_page_break_nodes=[
            "REQUIREMENT"
        ]
    )
    return config
23.6. Test report integration
StrictDoc can read test report files from several testing tools as SDoc content, which allows establishing traceability between requirements, test cases, and test results.
To enable traceability for imported test reports, enable requirement-to-source traceability. It is recommended to provide a dedicated folder for test report XML files to not mix human-written SDoc content and auto-generated test reports.
from strictdoc.core.project_config import ProjectConfig


def create_config() -> ProjectConfig:
    config = ProjectConfig(
        project_features=[
            "REQUIREMENT_TO_SOURCE_TRACEABILITY",
        ],
        include_doc_paths=[
            "/docs/**",
            # A dedicated folder where StrictDoc could find JUnit XML.
            "/reports/**",
        ],
    )
    return config
23.6.1. JUnit XML
JUnit XML format is mostly identical between different tools that produce it but there are subtle differences that must be handled case by case. StrictDoc supports several JUnit XML flavors. To be discovered by StrictDoc, the XML files must have one of the following extensions:
| Tool | Extension |
|---|---|
| Pytest | .pytest.junit.xml |
| CTest | .ctest.junit.xml |
| Google Test | .gtest.junit.xml |
| LLVM Integrated Tester (LIT) | .lit.junit.xml |
| cargo-nextest | .nextest.junit.xml |
Note
After the existing JUnit XML flavors have been implemented, it should be easy to add more tools in case their output differs.
Warning
The JUnit XML feature's status is experimental. The functionality has been implemented and passes basic integration tests but it has not received enough testing by the users. StrictDoc's own documentation is already using this feature and the JUnit XML traceability will be part of StrictDoc's own qualification package. It is expected that the JUnit XML will become a stable feature by no late than 2025 Q4.
23.6.2. LLVM Integrated Tester JUnit XML specifics
Specifically for LLVM Integrated Tester-produced JUnit XML, an extra config option must be provided because its output XML does not contain precise information about the test root folder.
from strictdoc.core.project_config import ProjectConfig


def create_config() -> ProjectConfig:
    config = ProjectConfig(
        project_features=[
            "REQUIREMENT_TO_SOURCE_TRACEABILITY",
        ],
        test_report_root_dict={
            "reports/tests_integration.lit.junit.xml": "tests/integration",
        },
    )
    return config
In this example, the expectation is that a user has generated a JUnit XML with LLVM LIT and the output XML is at reports/tests_integration.lit.junit.xml. The config line tells StrictDoc that this JUnit XML was produced by LIT from the tests/integration root folder.
23.6.3. Robot Framework XML
Robot Framework has its own native XML test report schema, sometimes referred to as output.xml. Files must end with .robot.xml to be recognized as such.
Warning
The Robot Framework test report feature's status is experimental.
23.6.4. cargo-nextest JUnit XML specifics
cargo-nextest produces JUnit XML when its JUnit reporter is enabled. To opt in, add the following to .config/nextest.toml and run nextest with that profile:
[profile.ci.junit]
path = "junit.xml"
The resulting file is written to target/nextest/ci/junit.xml and must be renamed (or copied) to end with .nextest.junit.xml for StrictDoc to recognize it.
In a cargo-nextest JUnit XML, every <testsuite> corresponds to one Rust test binary (the crate's unit tests, or one integration-test target). Each <testcase> carries:
- classname — the binary identifier (the crate name, optionally followed by ::<integration_test_name>);
- name — the fully qualified Rust test path within that binary (for example tests::add_works or tests::nested::nested_module_test).
cargo-nextest does not record the source file or line number of each test in the JUnit XML, so a test result is matched to a function by its Rust canonical path. The path is <classname>::<name>, where classname is the crate's [package] name, optionally followed by ::<integration_test_name>:
- my_crate, tests::add_works → my_crate::tests::add_works;
- my_crate::integration, integration_add → my_crate::integration::integration_add.
The Rust source-code reader registers each function under the same crate-qualified path.
Note
Rust #[ignore]-annotated tests are filtered out by cargo-nextest before the test binary is run, so they do not appear in the JUnit XML at all (they are neither counted in tests="N" nor emitted as <skipped>). Running with --run-ignored=all executes them as normal tests instead. There is currently no cargo-nextest setting that emits ignored tests as JUnit <skipped> entries.
23.7. Shadow features
At any given moment, StrictDoc may contain one or more features that have been implemented and are supported in the codebase, yet lack documentation.
In most cases, these features are still in their early stages and may not even be documented as experimental features.
The testing of these experimental features is typically done by developers or by selected users who have either requested or expressed interest in a specific feature.
If you happen to stumble upon such a hidden feature, we encourage you to use it and provide bug reports or share your experiences with it. However, please be prepared to encounter various unknown or undefined behaviors in the process.
24. StrictDoc's limitations
24.1. Limitations of RST support by StrictDoc
StrictDoc uses Docutils for rendering RST to HTML, not Sphinx. The implication is that no Sphinx-specific RST directives are supported. Refer to this issue for the related discussion of the limitations: Unexpected restriction on specific RST directives / compatibility with Breathe Sphinx Plugin #1093.
24.2. Limitations of web user interface
The existing implementation of the web user interface has the following limitations.
The user interface and the underlying backend implementation are not yet autonomous from the command-line workflow. A user still has to access the command line to run the server and commit the documents to Git manually.
The currently supported workflow for the server command must be hybrid:
- In one terminal window: run the server.
- In another window: check the changes made by the server in the .sdoc files. Commit the .sdoc files to Git.
The following essential features are still missing and will be worked on in the future:
- A dedicated screen where a user can commit and push changes to GitHub/GitLab or other Git servers.
- Adding/editing sections with LEVEL: None.
- Deleting a document.
- Deleting a section recursively with a correct cleanup of all traceability information.
- A separate screen for editing project settings.
- Editing File-based relations.
- Moving the TOC nodes of a document when it has one or more included documents.
- Editing .sgra grammar files.
25. Known issues
This section used to document known issues and non-obvious implementation details, but it has recently been decomposed into more specific sections such as:
26. Appendices
26.1. FREETEXT-TEXT migration (June 2024)
A new grammar node called TEXT has been introduced in the SDoc grammar, replacing the FREETEXT node as a more powerful feature.
The reasons for the migration:
- The [FREETEXT]..[/FREETEXT] markup element is limited. Unlike REQUIREMENT it is not possible to attach fields like MID or UID, which can be important for change tracking and importing/exporting from formats like ReqIF and SPDX, which assign unique identifiers to all nodes of the document / requirements graph, not just the requirements nodes.
- Historically, the [FREETEXT] node was implemented differently compared to the REQUIREMENT node, creating a lot of branching and requiring two separate sets of code to handle free text and requirements slightly differently.
- 15000 lines of code are removed, eliminating numerous branches, such as if node.is_requirement ... elif node.is_free_text.

There are three important consequences of this migration.
Consequence #1: The TEXT nodes can now have UID (if declared in a grammar) and MID (if the ENABLE_MID: True option is enabled), but the automatic generation of UIDs is disabled for TEXT nodes in the first version after the migration. User feedback regarding the potential use cases for TEXT node's UID/MID identifiers would be nice to have.
Consequence #2: Now it is possible to create a [LINK] to any custom elements, not only FREETEXT elements like it was before.
Consequence #3: It is now possible to place [TEXT] nodes anywhere within a document or a section. Previously, [FREETEXT] nodes could only be placed directly after the Document or Section titles. This limitation originated from the original implementation of FREETEXT but has now been removed. This should improve the experience for users whose documents contain a mix of requirements and text nodes.
Consequence #4: Previously, it was not possible to reference FREETEXT nodes from source files because FREETEXT lacked a UID field. Now, TEXT nodes can be referenced by a UID, just like any other REQUIREMENT-like node.
26.1.1. How to migrate from FREETEXT to TEXT
The backward compatibility is preserved. The users can still create SDoc documents with FREETEXT but internally the free text nodes will be anyway converted to TEXT nodes, and the FREETEXT node no longer exist in the SDoc document model.
The users are encouraged to perform the migration as follows.
The free text node:
[FREETEXT]
This is a free text node.
[/FREETEXT]
becomes
[TEXT]
STATEMENT: >>>
This is a free text node.
<<<
The TEXT node is now included to a default StrictDoc grammar by default. If a custom grammar is used, the default grammar definition for the TEXT node is as follows:
[GRAMMAR]
ELEMENTS:
- TAG: TEXT
  FIELDS:
  - TITLE: UID
    TYPE: String
    REQUIRED: False
  - TITLE: STATEMENT
    TYPE: String
    REQUIRED: True
- TAG: REQUIREMENT
  FIELDS:
  - TITLE: UID
    TYPE: String
    REQUIRED: False
  - TITLE: TITLE
    TYPE: String
    REQUIRED: False
  - TITLE: STATEMENT
    TYPE: String
    REQUIRED: True
The strictdoc export --formats sdoc --free-text-to-text ... command can be used for converting all FREETEXT nodes to TEXT nodes automatically. See strictdoc export --help for more details.
26.2. [[NODE]] migration (2025 Q2-Q3)
As of 2025 Q2, the following changes are made to StrictDoc's grammar in a partially backward-incompatible manner. The relevant GitHub issue related to the migration:
Migration: SDoc model: Merge Section, Node, Composite Node into just Node #2193
1) The [[CUSTOM_NODE]] syntax with two square brackets around the element name has been introduced for composite nodes.
Example of declaring a composite node in a grammar and using it in a document:
[GRAMMAR]
ELEMENTS:
- TAG: SECTION
  PROPERTIES:
    IS_COMPOSITE: True
    PREFIX: None
    VIEW_STYLE: Narrative
  FIELDS:
  - TITLE: MID
    TYPE: String
    REQUIRED: False
  - TITLE: UID
    TYPE: String
    REQUIRED: False
  - TITLE: TITLE
    TYPE: String
    REQUIRED: True

[[SECTION]]
TITLE: Section #1

[[/SECTION]]
Using the new syntax, it is now possible to declare any custom composite element, such as what [COMPOSITE_REQUIREMENT] used to provide before.
2) The previously used [SECTION] syntax with one square bracket around the SECTION is now DEPRECATED, but the old behavior is still supported. The users are encouraged to migrate all [SECTION] elements to the new [[SECTION]] syntax. To support the new behavior, the grammar must include a declaration for a composite SECTION element similar to the example provided above.
3) The [COMPOSITE_REQUIREMENT] node has been removed from the codebase. This is a backward-incompatible change, but it is assumed that no users should be affected since this feature has never been developed enough to be useful.
4) The document-level REQ_PREFIX has been renamed/aliased to PREFIX. The REQ_PREFIX form will still be recognized but writing SDoc files back to disk will result in the new PREFIX field to be written.
26.2.1. How to migrate from [SECTION] to [[SECTION]]
The migration from [SECTION] to the new composite [[SECTION]] syntax is mostly straightforward and can be done manually. However, StrictDoc also provides a dedicated configuration option to assist with this migration.
1) Manual approach
Update all instances of [SECTION] to [[SECTION]] manually, or use a combination of find and sed. Additionally, make sure to update all document grammar declarations to include the new composite [[SECTION]] element like described in the previous section.
Note
StrictDoc can automatically create the [[SECTION]] element even if it is not explicitly defined in the document grammar. However, since 2025 Q2, it is recommended that users always define explicit grammars with the SECTION element included.
Examples of a sed command for Linux and macOS:
# Linux
find . -type f -name '*.sdoc' -exec sed -i -e 's/^\[SECTION\]/[[SECTION]]/g' -e 's/^\[\/SECTION\]/[[\/SECTION]]/g' {} +

# macOS
find . -type f -name '*.sdoc' -exec sed -i '' -e 's/^\[SECTION\]/[[SECTION]]/g' -e 's/^\[\/SECTION\]/[[\/SECTION]]/g' {} +
2) Semi-automated approach (experimental)
StrictDoc can automatically migrate SDoc files if the project configuration option section_behavior is set as follows:
from strictdoc.core.project_config import ProjectConfig


def create_config() -> ProjectConfig:
    config = ProjectConfig(
        section_behavior="[[SECTION]]",
    )
    return config
With this option enabled, StrictDoc's export command will convert all [SECTION] nodes to [[SECTION]] when writing SDoc files.
To perform the migration, run the export command:
strictdoc export . --formats=sdoc
The resulting files will have all [SECTION] nodes replaced with [[SECTION]].
Additionally, when the section behavior is specified to [[SECTION]], the UI will mark the old section node as Deprecated.

26.3. Migrating StrictDoc Configuration: Python Replaces TOML (2025 Q4)
Until 2025-Q4, StrictDoc has been using TOML for its strictdoc.toml configuration file.
Since 2025-Q4, the new configuration format moving forward is Python. Once the new Python configuration syntax has been sufficiently tested, using TOML will trigger deprecation warnings. The removal of TOML support is expected to take place in 2026-Q1.
The rationale for this change is that configuring StrictDoc with a Python file provides greater flexibility for users who need to:
- Create custom generators
- Remove existing generators
- Customize requirement and document tree validations
- Customize project statistics
With a configuration file written directly in Python, it becomes much easier for users to inject their own Python code into StrictDoc’s traceability pipeline. Achieving the same with TOML would require additional layers of indirection.
Instead of using strictdoc.toml, the new approach includes strictdoc_config.py with the following syntax:
from strictdoc.core.project_config import ProjectConfig


def create_config() -> ProjectConfig:
    config = ProjectConfig(
        project_title="StrictDoc Documentation",
        dir_for_sdoc_assets="assets",
        dir_for_sdoc_cache="output/_cache",
        project_features=[
            "TRACEABILITY_SCREEN",
            "SEARCH",
        ],
        # ...
    )
    return config
All TOML configuration options specified in StrictDoc’s documentation are still valid but must be migrated to their Python equivalents.
See StrictDoc's own config file for a realistic example.
Refer to the ProjectConfig class for a complete overview of all available options.